
TL;DR
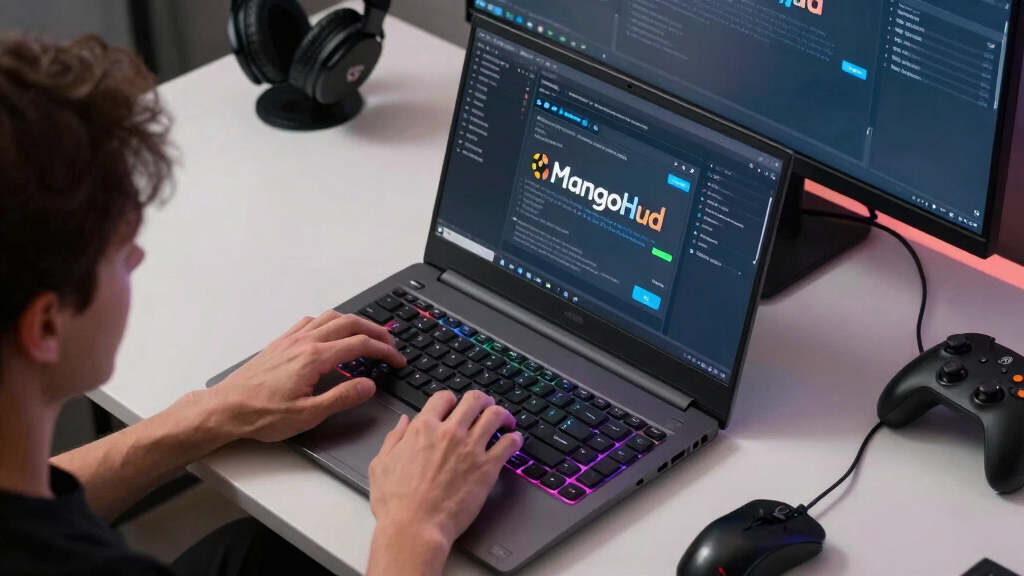
MangoHud is a Linux gaming overlay that shows real-time FPS, frame time, CPU/GPU use, temperatures, power draw, and VRAM while you play SteamOS, native Linux, or Proton games. Use it with a lean layout: FPS, frame time, GPU load, temperature, and battery or power data, then add logging only when you are testing a specific problem.
The fastest way to ruin a cozy gaming night is a neon overlay shouting 27 numbers over your character’s face. Click, whirr, flash: suddenly your game looks less like a world and more like a tax form with shaders.
You want MangoHud because it answers the plain questions: is the game smooth, is the machine hot, is SteamOS or Proton behaving, and which setting should you change next? This guide keeps the overlay small, readable, and useful, with five useful signals doing most of the work.
Start with FPS, frame time, GPU load, temperature, and power or battery; add VRAM only when textures or memory pressure matter.
Frame time explains stutter better than average FPS: 16.7 ms is the 60 fps target, and 33 ms is a visible hitch.
For Steam and Proton games, test with a clear launch option and record platform, SteamOS version, Proton version, game build, settings, and resolution.
Use MangoHud logs for one-question tests, then turn logging off for normal play.
Treat leaks and forum performance claims as unconfirmed until release notes or repeatable tests support them.
MangoHud Explained Without Turning Your Game Into a Spreadsheet
MangoHud is a Linux gaming overlay for SteamOS, native Linux, and Proton games. Keep it lean: FPS, frame time, GPU load, temperature, and power or battery data tell you most of what you need without covering your game in neon accounting.
At 60 fps, each frame gets about 16.7 ms. A 33 ms spike is a felt hitch, even when the average FPS looks fine.
What MangoHud Is Actually For
MangoHud puts live performance numbers over your game so you can connect a bad moment to a likely cause. It is a dashboard, not a verdict: useful when you test the same scene with the same settings and avoid turning one noisy moment into a theory.
FPS gives the headline
Use FPS for a quick read on overall smoothness, but do not stop there. Average FPS can look fine while pacing still feels uneven.
Frame time explains stutter
When rain, camera swings, markets, or shader compilation create spikes, frame time shows the hitch directly.
GPU load points to settings
If GPU load is pinned, lowering resolution, shadows, reflections, or effects is more likely to help.
Linux gaming overlay MangoHud
As an affiliate, we earn on qualifying purchases.
As an affiliate, we earn on qualifying purchases.
Keep These Numbers On Screen
The clean layout is small, muted, and placed where it does not fight the game. Add VRAM when textures or memory pressure matter. Hide everything else until a real problem needs chasing.
| Metric | What it tells you | Good reaction | Always visible? |
|---|---|---|---|
| FPS | How many frames arrive each second. | Use it for quick smoothness checks. | ✓ Yes |
| Frame time | How evenly each frame arrives. | Use it to spot stutter and pacing trouble. | ✓ Yes |
| GPU load | How hard the graphics chip works. | Lower resolution, shadows, or effects if it stays near max. | ✓ Yes |
| Temperature | How hot the chip gets under load. | Cap FPS or lower power if heat and fans climb. | ✓ Yes |
| Power or battery | How fast a handheld drains charge. | Pick a frame cap that feels good and lasts longer. | ✓ Yes |
| VRAM | How much graphics memory textures use. | Lower texture quality if memory fills and hitching starts. | ~ When needed |
| Every sensor available | A wall of numbers with weak decisions behind it. | Turn it off for normal play. | ✗ No |

VIVO Hardware Pack for Monitor Stand, Includes Pole Cap, Cable Clips, Screws, Spacers, Allen Wrenches, Black, PT-SD-HP02
Package Contents: Includes Pole Cap (x1), Arm Cable Clip (x4), Pole Cable Clip (x1), M6x16mm Screw (x3), M6…
As an affiliate, we earn on qualifying purchases.
As an affiliate, we earn on qualifying purchases.
Steam Setup Without Guesswork
Install MangoHud through your distribution, SteamOS-friendly path, or official project instructions. Then apply it to one game at a time so testing stays reversible.
Install
Use your distro package manager, trusted app store path, or official instructions.
Open Steam
Right-click the game and open Properties.
Add launch option
Wrap only the game you want to test.
Confirm overlay
Check the menu or first loaded scene.
Back out cleanly
Remove it if an online game refuses to start.
For Proton games, the wrapper starts before the Windows game runs, so MangoHud can report the rendering work that reaches Linux graphics drivers.
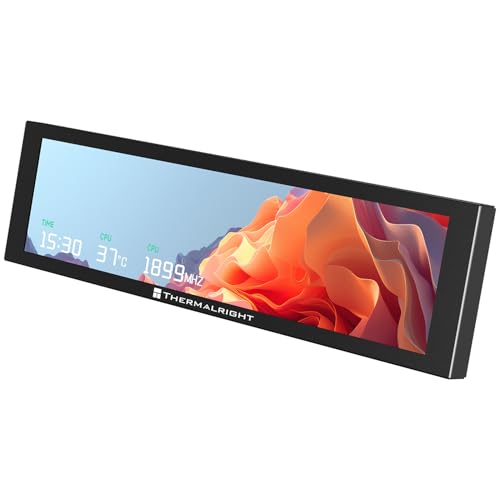
Thermalright Trofeo Vision 9.16 LCD Black, 9.16-inch Full-Color LCD Magnetic Display Screen, 1920×480 Resolution, Easy to Install,Master CPU/GPU Temperature(Black)
[9.16-inch IPS display] Full color IPS panel screen accurately reproduces the true and delicate colors, with good viewing…
As an affiliate, we earn on qualifying purchases.
As an affiliate, we earn on qualifying purchases.
Read The Overlay Like A Decision Tree
The useful question is not “how many numbers can I show?” It is “which setting should I change next?” Frame pacing, load, heat, and power each point to different actions.
When GPU load is pinned
- Lower resolution scale before chasing tiny settings.
- Try shadows, reflections, volumetrics, and heavy effects.
- Keep the same scene and resolution for each test.
When FPS looks fine but play feels bad
- Watch frame time instead of average FPS.
- Test a frame cap for uneven pacing.
- Consider CPU work, shader compilation, streaming, or Proton changes.
Proton game performance logging tools
As an affiliate, we earn on qualifying purchases.
As an affiliate, we earn on qualifying purchases.
Logging Is For One-Question Tests
MangoHud logs are useful when you compare before and after. They are less useful when curiosity becomes a folder full of mystery charts. Record the boring details first.
Platform and SteamOS version
Write down the system, OS version, graphics driver path, and whether the game is native Linux or Proton.
Game build and Proton version
A build update or Proton change can explain a shift before any graphics setting deserves blame.
Settings and resolution
Use the same scene, preset, resolution, and route. Treat leaked claims as unconfirmed until notes or repeatable tests support them.
Trace The Problem, Then Stop Staring
A clean MangoHud workflow connects the symptom to the likely cause, then gets out of your way so the game can be a game again.
Best default: a tiny top-left overlay, muted color, no blinking clutter, no permanent logging, and only the metrics that answer your next decision.
Understand the Overlay in One Minute
MangoHud Explained Without Turning Your Game Into a Spreadsheet starts with a simple idea: MangoHud is an open-source Linux overlay that puts live performance numbers on top of your game. You see FPS, frame time, GPU load, and temperatures while the action keeps moving, according to the MangoHud project documentation [1].
The important part is not that MangoHud can show numbers. It is that those numbers sit close enough to the moment that you can connect a problem to a cause. If rain starts, the camera swings, and the frame-time line jumps, you have a better clue than “this game feels bad.” If GPU load is already pinned, lowering a graphics setting has a good chance of helping. If GPU load is modest but the pacing still lurches, the problem may live somewhere else, such as CPU work, shader compilation, streaming, or the Proton layer.
Think of it like a car dashboard: you do not stare at every sensor wire while driving, you glance at speed, heat, and warning lights. For instance, if a native Linux game feels syrupy during rain effects, MangoHud can show whether GPU load is pinned or the frame time is wobbling. That difference matters because it changes your next move: lower reflections for a GPU-bound scene, test a frame cap for uneven pacing, or stop fiddling with shadows when the evidence points elsewhere.
On SteamOS and desktop Linux, MangoHud sits over many Vulkan and OpenGL games. With Proton, DirectX games often pass through translation layers such as DXVK or VKD3D-Proton, so MangoHud can still report the rendering work that reaches Linux graphics drivers. The tradeoff is that an overlay is still a lens, not a verdict. It tells you what the system is doing while you play; you still need repeatable scenes, matching settings, and a little restraint before turning one noisy moment into a grand theory.
Keep These Five Numbers On Screen
MangoHud Explained Without Turning Your Game Into a Spreadsheet means choosing five numbers that lead to a clear action: FPS, frame time, GPU load, temperature, and power or battery. Add VRAM when textures misbehave. Hide the rest until you have a real problem to chase.
| Metric | What it tells you | Good reaction |
|---|---|---|
| FPS | How many frames you get each second. | Use it for quick smoothness checks. |
| Frame time | How evenly each frame arrives. | Use it to spot stutter and pacing issues. |
| GPU load | How hard the graphics chip works. | Lower resolution, shadows, or effects if it stays near max. |
| Temperature | How hot the chip gets under load. | Cap FPS or lower power if fans howl and heat climbs. |
| Power or battery | How fast a handheld drains charge. | Pick a frame cap that feels good and lasts longer. |
| VRAM | How much graphics memory textures use. | Lower texture quality if memory fills and hitching starts. |
The reason this small set works is that each number answers a different kind of question. FPS tells you the headline, but frame time tells you whether the headline is honest. GPU load tells you whether visual settings are likely to matter. Temperature and power tell you what the machine is paying to hold that performance. On a handheld, that last part is not trivia; a lovely 60 fps preset that drains the battery in a hurry may be worse than a steady 40 fps preset that lets the train ride survive.
A good casual layout is tiny: top-left, one line, muted color, and no blinking circus. Suppose your action game holds 60 fps but the screen hiccups when you enter a market. Keep frame time visible; if it spikes when NPCs pop in, you found the clue. The tradeoff is attention. Every extra counter steals a little bit of the screen and a little bit of your brain, so a clean overlay is not just prettier. It makes the useful signal easier to notice when something actually goes wrong.
Get MangoHud Running in Steam Without Guesswork
You can get MangoHud running in Steam by installing it from your Linux distribution or SteamOS-friendly method, then adding mangohud %command% to the game’s launch options. For Proton games, that wrapper starts before the Windows game runs, so the overlay can show the Vulkan or OpenGL work underneath [1].
- Install MangoHud from your distro package manager, trusted app store path, or the official project instructions.
- Open Steam, right-click the game, and choose Properties.
- Add mangohud %command% in Launch Options.
- Start the game and confirm the overlay appears on the menu or first loaded scene.
- Remove the launch option if an online game refuses to start, then test again without the overlay.
The launch option matters because it keeps the test tied to one game instead of turning your whole desktop into a monitoring experiment. That makes it easier to compare results and easier to back out if something behaves oddly. It also keeps you honest: if the same game, same scene, same Proton version, and same settings behave differently after the overlay is removed, you have learned something. If nothing changes, MangoHud was probably only the messenger.
For a Proton game that stutters after a build change, write down the game version, Proton version, graphics preset, and resolution before testing. If someone claims a leaked driver doubles performance, mark it unconfirmed until release notes or your own repeatable run back it up. The deeper habit is to separate setup problems from performance problems. A missing overlay, a bad launch option, an anti-cheat refusal, and a real rendering bottleneck can all look like “MangoHud did something weird” if you skip the boring details.
Spot Stutter Fast When FPS Looks Fine
MangoHud Explained Without Turning Your Game Into a Spreadsheet works because frame time tells you what average FPS hides. At 60 fps, a frame should arrive about every 16.7 ms; at 90 fps, about 11.1 ms. When you see a jump to 33 ms, you felt the hitch.
Average FPS can look calm while frame time shows the bump, thunk, or tiny freeze you actually felt.
This is why averages can be sneaky. A game that renders most frames quickly can still feel rough if one frame arrives late every few seconds, because your eyes and hands notice the interruption more than the arithmetic. A short spike also explains why chasing a higher average is not always the right cure. Sometimes a lower cap with even delivery feels better than an uncapped number that swings around like it had too much coffee.
For instance, a game can average 58 fps and still feel rough if every few seconds one frame lands late. On a 90 Hz Steam Deck OLED, a 45 fps cap lines up with a 22.2 ms frame target when the game holds it. A flat frame-time graph feels smoother than a higher number that jitters like a loose shopping cart. The tradeoff is latency: higher frame rates can feel more responsive, especially in fast games, but only if the system can deliver them consistently. MangoHud helps you decide whether you are gaining responsiveness or just buying a taller number with shakier pacing.
Make Steam Deck Readouts Worth the Space
A useful Steam Deck readout shows only the numbers that help you pick a setting right now: frame rate, frame time, battery drain, GPU load, and temperature. Record the device model, SteamOS version, Proton version, resolution, and refresh rate whenever you share a performance claim.
- For battery life: watch watts and estimated time, then test a 40 fps or 45 fps cap.
- For smoothness: watch frame time before blaming raw FPS.
- For heat: listen for fan whoosh and check temperature after five minutes, not five seconds.
- For public results: name Steam Deck LCD or OLED, SteamOS version, Proton version, game build, settings, and resolution.
- For screenshots: label mature-rated games clearly when rating or content matters.
The Steam Deck makes these tradeoffs feel immediate because performance, heat, noise, and battery life all share the same small body. A higher cap can make camera movement feel cleaner, but it can also raise watts, wake the fan, and shorten the session. A lower cap can feel calmer and cooler, but it may make aiming or fast panning feel heavier. MangoHud is useful because it shows the cost of each choice while your hands can still remember how the game felt.
According to Valve’s Deck Verified guidance [2], Verified and Playable labels describe game-by-game compatibility. They are not a permanent benchmark promise. If a store label, Proton build, or SteamOS update changes, your old performance notes may need a fresh test. That is especially true when comparing Deck LCD and OLED results, because refresh behavior, battery expectations, and user settings can differ enough to make a casual “runs great” comment less useful than it sounds.
Build One Clean Layout for Play and Testing
A clean MangoHud layout gives you two modes: play mode with a tiny corner readout, and test mode with extra numbers for diagnosis. Keep play mode calm. Save the louder layout for five-minute experiments, like testing whether a texture pack fills VRAM or a 45 fps cap smooths travel.
- Play mode: FPS, frame time, GPU temperature, and battery or power.
- Test mode: CPU load, GPU load, VRAM, RAM, frame-time graph, and logging toggle.
- Battery mode: FPS, watts, estimated battery time, and temperature.
The split matters because play and testing ask different things from your attention. During play, the overlay should answer “is anything obviously wrong?” and then get out of the way. During testing, the overlay can be busier because you are deliberately looking for cause and effect. Mixing those modes is how you end up staring at RAM counters during a boss fight and still not knowing which setting to change.
Use ~/.config/MangoHud/MangoHud.conf for your default setup, then point Steam at a separate file with MANGOHUD_CONFIGFILE when you want a game-specific layout. A tidy name like deck-45fps.conf beats a mystery file you made at 1 a.m. The practical payoff is repeatability: when you return to a game weeks later, a named config tells you what you were testing and keeps you from rebuilding the same overlay by memory while the title screen loops in the background.
Use Logs Only When They Answer a Question
MangoHud logging helps when you have a before-and-after question, not when you feel curious for no reason. Use logs to compare one changed setting, one Proton version, or one graphics preset at a time, then turn logging off so your session feels like a game again.
- Pick one question: Does FSR quality mode reduce stutter in the city?
- Run the same route: Use a 90-second path, save point, or benchmark scene.
- Change one setting: Texture quality, frame cap, Proton version, or resolution.
- Compare the result: Look at frame-time spikes, average FPS, and power draw.
The point of a log is evidence, not decoration. If you change resolution, texture quality, Proton version, and frame cap all at once, the log may show improvement, but it will not tell you which change did the work. A slower, one-change test can feel fussy, but it saves time because the answer is usable. You can keep the setting that helped and ignore the settings that only made the menu look busier.
According to the MangoHud documentation [1], its logging features can capture performance data for later review. That is useful when you test a specific change. It gets noisy fast when you collect numbers without a plan, like emptying a toolbox across the floor just to find one screwdriver. The tradeoff is friction: logging takes you slightly out of play mode and into lab mode, so make the lab session short, write down the result, and go back to enjoying the game once the decision is made.
Turn the Numbers Into Better Game Settings
The fastest way to read MangoHud is to connect each warning sign to one practical move. High GPU load points toward lower resolution or effects. High CPU load points toward crowds, physics, or background tasks. High temperatures point toward a frame cap, lower TDP, or better airflow.
- GPU near max: lower resolution scale, shadows, ambient occlusion, or ray tracing.
- CPU near max: lower crowd density, simulation settings, view distance, or close background apps.
- VRAM full: lower textures before lowering everything else.
- Power draw high: try a lower FPS cap before cutting visual quality.
- Frame time spiky: test a cap, different Proton version, or shader pre-cache behavior.
The deeper trick is to avoid treating every number as a moral emergency. A GPU at 99 percent can be perfectly normal if the frame time is steady and the temperature is under control. A warm chip can also be fine if it is stable and the fan is not ruining the room. What matters is the combination: load plus pacing, heat plus noise, power plus battery, VRAM plus hitching. MangoHud becomes useful when you read patterns instead of panicking at a single high value.
For instance, in a dense city scene, you may see GPU load at 99 percent, temperature steady, and frame time mostly flat. That means the game is graphics-bound, not broken. Drop shadows one step, keep textures sharp, and let MangoHud become a quiet coach instead of a spreadsheet costume. In another game, you might see lower GPU load with ugly frame-time spikes; that points away from raw graphics settings and toward caps, CPU-heavy options, shader behavior, or a Proton change. Same overlay, different implication, better decision.
Frequently Asked Questions
Does MangoHud work with Proton games on SteamOS?
Yes, MangoHud can work with many Proton games because those games often render through Vulkan translation layers. Use mangohud %command% in Steam launch options, then record the Proton version and game build if you share results.
Will MangoHud lower my FPS?
MangoHud aims to stay lightweight, but any overlay can add a little work on weak hardware or very busy layouts. Test the same scene with and without logging, using the same resolution and graphics preset.
Which MangoHud metrics should I enable first?
Start with FPS, frame time, GPU load, temperature, and power or battery. Add VRAM only when you test texture settings, hitching, or memory pressure.
Is MangoHud safe to use in online games?
Many games tolerate overlays, but anti-cheat behavior varies by game and update. If an online game fails to launch, remove MangoHud first, and never try to bypass anti-cheat rules.
Where do I edit MangoHud settings?
Your usual config lives at ~/.config/MangoHud/MangoHud.conf on many Linux setups. For per-game testing, point Steam to another file with MANGOHUD_CONFIGFILE and keep the layout names plain.
Conclusion
MangoHud should feel like a tiny instrument panel, not homework. Keep it small, read frame time before panicking over FPS, and change one setting at a time.
When the overlay fades into a quiet corner and the game takes the room again, you have it right: a few bright numbers, fan whispering, world moving smoothly.