TL;DR
The Steam Deck recovery image is Valve’s official bootable repair drive for reinstalling, repairing, or wiping SteamOS when your Deck will not boot. You write it to an 8 GB or larger USB drive or microSD card, boot from it, then choose between preserving data, clearing user files, or doing a full factory re-image [1]. Use Valve’s current download, back up saves when you can, and treat third-party handheld instructions as separate.
A black Steam Deck screen feels louder than it looks.
The Steam Deck recovery image is the thing you reach for when SteamOS coughs, loops, or refuses to load. You do not need to speak Linux; you need the right file, an 8 GB or larger drive, and a steady hand with the menu choices [1].
You will learn what the image is, which option saves data, which one wipes everything, and how to avoid the panic-click that turns a repair job into a clean slate.
When SteamOS will not boot, this is the official repair drive.
The Steam Deck recovery image is Valve’s bootable recovery environment for reinstalling, repairing, clearing, or fully wiping SteamOS. You write it to an 8 GB or larger USB drive or microSD card, boot from it, then choose the least destructive option that fits the problem.
Think of it as a rescue disk, not a Linux project.
Normal recovery uses menu choices, not terminal commands.A temporary repair workspace for a stuck Deck.
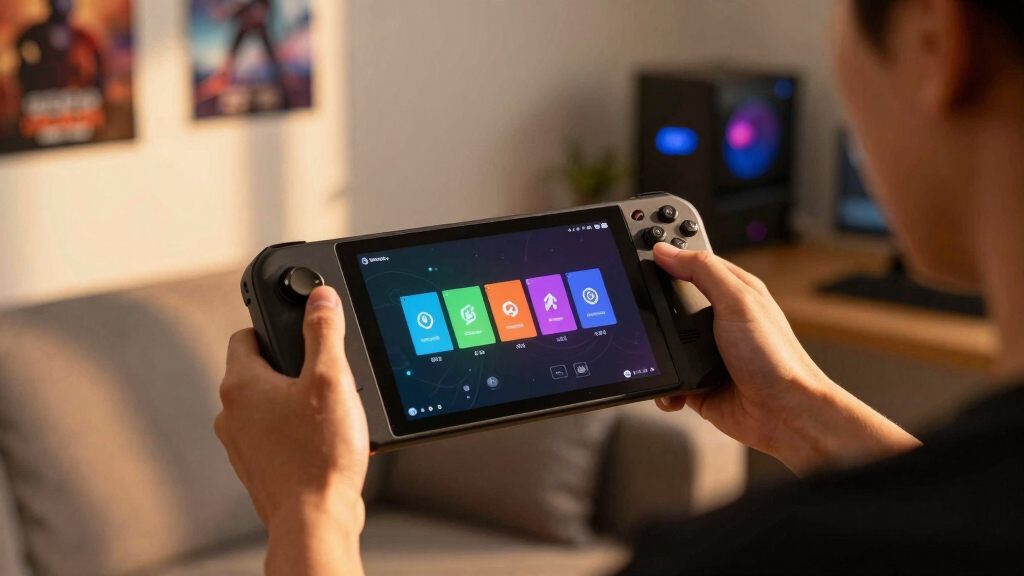
When the recovery desktop appears, you are not inside your normal Steam Deck install. The device is running a temporary environment from the removable drive so you can repair, clear, or replace the internal SteamOS setup.
Boots when SteamOS cannot
Useful for boot loops, failed updates, corrupted system files, and devices that will not reach the normal gaming interface.
Does not save your library
The image is a repair tool. It is not a copy of your screenshots, mods, downloads, saves, or personal files.
No Linux fluency required
For ordinary recovery, your job is choosing the right button. Terminal tools are for support-guided fixes.

SABRENT USB Type-C 3-Port Gaming Hub for Steam Deck | 5Gbps USB 3.2, Dual USB-A Ports, PD Charging, Compact Design (HB-STDK)
The Deck’s Best Friend: Designed specifically for Valve’s Steam Deck and Steam Deck OLED, this form-fitted USB-C hub…
As an affiliate, we earn on qualifying purchases.
As an affiliate, we earn on qualifying purchases.
Which recovery button saves data, and which one wipes it?
The safest recovery choice is usually Reinstall SteamOS. The most destructive choice is Re-image Steam Deck, which returns the device to stock SteamOS and removes user data.
| Recovery option | What it does | Data risk | Best use case |
|---|---|---|---|
| Reinstall SteamOS | Repairs SteamOS while trying to keep games and personal content. | ✓ Lower | Your Deck boot-loops after an update or channel switch. |
| Clear local user data | Removes downloaded games and personal content from the home area. | ~ Medium | You want a clean user profile without replacing every system file. |
| Re-image Steam Deck | Performs a full factory reset and replaces the system with stock SteamOS. | ✗ Full wipe | You are selling the Deck or the install is badly broken. |
| Recovery tools | Opens lower-level tools, including terminal access. | ~ Depends | Valve support or an advanced guide gives exact instructions. |

SamData USB Flash Drive 8GB 1 Pack USB 2.0 Thumb Drive Swivel Memory Stick Data Storage Jump Drive Zip Drive Drive with Led Indicator (Black, 8GB-1Pack)
[Package Offer]: 1 Pack USB Flash Drive 8GB Available in black.
As an affiliate, we earn on qualifying purchases.
As an affiliate, we earn on qualifying purchases.
Treat it like making a Windows installer.
Download Valve’s file, write it to removable media, boot the Deck from that media, then read the menu text twice before committing to a recovery action.
Download
Get Valve’s current recovery image from Steam Support.
Pick media
Use an 8 GB or larger USB drive or microSD card.
Write image
Use Rufus, Balena Etcher, or a similar imaging tool.
Shut down
Power off fully. Sleep mode is not enough.
Connect
Insert the USB-C drive, hub, or microSD card.
Boot menu
Hold Volume Down, press Power, then choose EFI USB or external boot.
Choose
Click the recovery action only after reading it twice.

JSAUX ModCase for Steam Deck/Steam Deck OLED, PC0104 Modular Valve Steam Deck Case Include Protective Case, Face Cover, Cooling Fan, Metal Bracket and Strap – Cooler Set
Complete Protection: The JSAUX ModCase provides full protection for your Steam Deck with its eco-friendly PC-ABS and silicone…
As an affiliate, we earn on qualifying purchases.
As an affiliate, we earn on qualifying purchases.
Try the small fixes that match a bad update, flat battery, or confused accessory.
Recovery is for software trouble you cannot clear from normal SteamOS menus. A five-minute check can save you from redownloading games and rebuilding a handheld setup.
Low-risk checks
- Charge for at least 30 minutes if the battery was low or the screen stays dark.
- Remove the microSD card if the Deck hangs while loading the library.
- Unplug docks, hubs, and unusual adapters if boot gets stuck after a new accessory.
Repair-shaped problems
- Try Reinstall SteamOS before Re-image when the problem looks like a broken update.
- Check Steam Cloud status for games you care about before choosing a wipe option.
- Ignore random terminal fixes unless Valve support or a trusted guide explains the exact reason.

Silicon Power 1TB SDXC Micro SD Card Gaming Memory Card, Compatible with Nintendo-Switch and Steam Deck
UHS Speed Class 3 (U3) and Video Speed Class 30 (V30)
As an affiliate, we earn on qualifying purchases.
As an affiliate, we earn on qualifying purchases.
What changes after recovery, and what stays tied to Steam?
Your account, purchases, age ratings, and Steam Deck Verified labels live with Steam. Local installs, screenshots, mods, and personal files are the pieces that can disappear during a wipe.
Decision scale
If performance changes after recovery, record the SteamOS version, Proton version, and game build before comparing results. The image is only one part of the software stack.
Where official guidance ends and community experiments begin.
Official recovery starts with Valve’s image and menu names. Community advice begins when someone suggests a custom image, script, or forum-only command.
What you can safely ignore.
For normal recovery, you do not need to understand kernels, partitions, or shell commands. Save your attention for the official file, the boot menu, and the recovery option names.
Ignore mystery commands
If an instruction sounds like something from a hacker-movie terminal and you do not know what it changes, pause before typing it.
Ignore custom images
Custom tools can help advanced users, but they are experiments when your goal is a plain Steam Deck repair.
Ignore file system debates
Valve’s recovery workflow is built around visible choices. Deep Linux vocabulary is rarely needed for the basic path.
Key Takeaways
- Use Valve’s official Steam Deck recovery image and an 8 GB or larger removable drive, not a third-party mirror.
- Reinstall SteamOS is the repair-first option; Re-image Steam Deck is the full wipe.
- You do not need Linux commands for normal recovery, and random terminal fixes can make the problem worse.
- Steam purchases, age ratings, and Steam Deck Verified labels stay tied to Steam, but local files can disappear during a wipe.
- For performance problems after recovery, record the SteamOS version, Proton version, and game build before comparing results.
What the Recovery Image Actually Is
Steam Deck Recovery Image Explained for Non-Linux Users is best read as a rescue drive, not a mystery Linux project. It is a bootable copy of Valve’s recovery environment that runs from USB or microSD and lets you repair SteamOS when the internal system is too broken to start [1].
Think of it like a spare key taped under a toolbox. Your Deck’s internal storage may be jammed, but the recovery drive gives the device another way in.
When the fan gives a soft whirr and the recovery desktop appears, you are not using your normal Steam Deck install. You are running a temporary repair workspace from the removable drive.
The recovery image is not a backup of your games, screenshots, mods, or save files. It is a repair tool for SteamOS.
The safest recovery choice is usually Reinstall SteamOS because it tries to repair the operating system while keeping your games and personal files. The most destructive choice is Re-image Steam Deck, which returns the device to stock SteamOS and removes user data, installed games, apps, and other operating systems [1].
| Recovery option | What it does | Best use case |
|---|---|---|
| Reinstall SteamOS | Repairs SteamOS while trying to keep games and personal content. | Your Deck boot-loops after an update. |
| Clear local user data | Removes downloaded games and personal content from the home area. | You want a clean user profile without replacing every system file. |
| Re-image Steam Deck | Performs a full factory reset and replaces the system with stock SteamOS. | You are selling the Deck or the install is badly broken. |
| Recovery tools | Opens lower-level tools, including terminal access. | Valve support or an advanced guide tells you exactly what to do. |
A real example: if your Deck freezes after switching update channels, Reinstall SteamOS is the sensible first click. If you are handing the Deck to a sibling and want your account, games, screenshots, and mods gone, Re-image Steam Deck fits that job.
Your Safe Recovery Path in 7 Steps
Steam Deck Recovery Image Explained for Non-Linux Users becomes much less scary when you treat it like making a Windows installer. You write Valve’s file to a removable drive, boot the Deck from that drive, wait through a slow desktop load, then choose the least destructive repair option that fits your problem [1].
- Download Valve’s current recovery image from the official Steam Support page, not a mirror or random forum link.
- Use an 8 GB or larger USB drive or microSD card. Assume it will be erased during setup.
- Write the image with a tool such as Rufus on Windows or Balena Etcher on macOS or Linux.
- Shut the Steam Deck down fully. Sleep mode is not enough for this job.
- Connect the drive through USB-C or insert the microSD card, depending on what you made.
- Hold Volume Down and press Power, then pick the EFI USB or external boot option when the boot menu appears.
- Choose the recovery action only after reading the menu text twice. Click, pause, breathe, then click again.
The slow part often surprises people. A cheap USB stick can make the recovery desktop take several minutes to appear, with a black screen that feels like nothing is happening.
What to Try Before You Wipe the Deck
Before you wipe anything, try the small fixes that match a bad update, a flat battery, or a confused accessory. Recovery is for software trouble you cannot clear from normal SteamOS menus, so a five-minute check can save you from downloading gigabytes and rebuilding your whole handheld setup.
- Charge for at least 30 minutes if the battery was low or the screen stays dark.
- Remove the microSD card if the Deck hangs while loading the library.
- Unplug docks, hubs, and odd adapters if boot gets stuck after a new accessory.
- Try Reinstall SteamOS before Re-image when the problem looks like a broken update.
- Check Steam Cloud status for games you care about before choosing any wipe option.
Say your Deck crashes after a beta update and now shows the logo, spins, and drops back to black. That is a repair-shaped problem, not an automatic full reset.
What Non-Linux Users Can Safely Ignore
Steam Deck Recovery Image Explained for Non-Linux Users means you can skip most Linux vocabulary and still make smart choices. You do not need to understand kernels, partitions, or shell commands for the normal recovery menu; you need to know which button preserves files and which button wipes them [1].
If a friend tells you to run a command you do not understand, stop. The Recovery tools option can be powerful, but it can also turn a small boot problem into a messy afternoon.
- Ignore file system debates unless Valve support asks for them.
- Ignore random terminal commands pasted without a clear reason.
- Ignore custom images when your goal is a plain Steam Deck repair.
- Save your attention for the official image, the boot menu, and the recovery option names.
A simple rule works well: if the instruction sounds like something you would type into a hacker movie terminal, you probably do not need it for a normal recovery.
What Changes After Recovery, and What Stays the Same
After recovery, SteamOS may feel fresh, but your account, purchases, ratings, and store compatibility labels still live with Steam. What changes depends on the option you chose: a repair may leave games alone, while a full re-image makes the handheld feel like it just came out of the box.
Your Steam library does not vanish from your account. The local copies on the Deck can vanish, though, which means large games may need another long download over Wi-Fi.
Steam Deck Verified badges and age ratings also do not change because you ran recovery. A game rated ESRB Teen or PEGI 16 remains that rating, and compatibility labels still come from Steam’s store data.
If a game runs differently after recovery, write down the SteamOS version, Proton version, and game build before blaming the image. Performance claims only make sense when the platform and version are named.
Where Official Ends and Community Advice Begins
Official recovery advice starts with Valve’s download and menu names; community advice starts when someone tells you to use a custom image, a script, or a forum-only command. Custom tools can help advanced users, but non-Linux owners should treat them as experiments unless Valve support or clear device documentation says otherwise.
According to Valve, the Steam Deck recovery process uses Valve’s own recovery image and boot menu workflow [1]. That should be your anchor when Reddit threads, Discord advice, and old videos disagree.
As of May 2025 reporting on SteamOS 3.7.8, official recovery-image work had expanded for some AMD handhelds, with device support caveats [2]. That is separate from fixing a Steam Deck, so do not mix instructions meant for a ROG Ally or Legion Go into your Deck repair.
Rumors and leaks about future Steam Deck hardware remain unconfirmed until Valve says otherwise. They should not affect which recovery image you use on the Steam Deck in your hands.
The Simple Rule That Keeps You Out of Trouble
The simple rule is to use the least destructive fix that still solves the problem. Start with reversible checks, move to Reinstall SteamOS if the operating system is damaged, and save Re-image Steam Deck for the moment when you accept a clean slate.
That order protects you from the most common mistake: treating every boot problem like a factory reset problem. It is the difference between tightening a loose screw and replacing the whole door.
If the Deck belongs to a child, roommate, or partner, pause before wiping it. Screenshots, offline saves, emulation folders, and custom layouts can live locally, and the loss feels very real when the screen comes back clean and empty.
Frequently Asked Questions
Where should I download the Steam Deck recovery image?
Download it from Valve’s official Steam Support page: https://help.steampowered.com/en/faqs/view/1B71-EDF2-EB6D-2BB3 [1]. Avoid mirrors, old forum uploads, and video-description links because recovery files can change over time.
Will the recovery image delete my games and saves?
It depends on the option you choose. Reinstall SteamOS tries to keep games and personal content, while Re-image Steam Deck performs a full reset and removes local data [1]. Steam Cloud saves may return after login, but local-only files need a backup.
Do I need Linux knowledge to use the recovery image?
No. The normal recovery path uses a boot menu and recovery desktop, not command-line work. You only enter Linux-style territory if you open Recovery tools or follow advanced support instructions.
Can I use the same image for a ROG Ally or Lenovo Legion Go?
Do not assume that. SteamOS support for some other AMD handhelds has had separate compatibility notes, and May 2025 reporting around SteamOS 3.7.8 described caveats for non-Steam Deck devices [2]. For a Steam Deck repair, stick with the Steam Deck instructions.
How long does Steam Deck recovery take?
Plan for 20 to 60 minutes, plus game downloads if you wipe local storage. The first boot from a slow USB drive can sit on a black screen long enough to make you nervous, so give it time before you pull the plug.
Conclusion
Remember the order: check the small stuff, try the repair option, wipe only when you mean it. The Steam Deck recovery image is a safety rope, not a magic eraser.
Keep a prepared recovery drive in a drawer, labeled in thick marker, so the next black screen feels like a repair job instead of a disaster.