TL;DR
Interpupillary distance, or IPD, is the distance in millimeters between the centers of your pupils. Matching your headset setting to an accurate IPD measurement helps the lenses align with your eyes, producing a clearer image with less squinting, fatigue, and headache risk.
A difference of just a few millimeters can turn a sharp virtual cockpit into a dashboard smeared with soft text and glowing edges. Your straps may feel secure and the foam may sit gently against your cheeks, yet your eyes still ache after twenty minutes. The hidden culprit is often interpupillary distance, usually shortened to IPD.
IPD tells you how far apart the centers of your pupils sit, measured in millimeters. A headset uses that number to place each lens in front of the matching eye. When those positions line up, the two images settle together like cleanly meshing gears; when they do not, your eyes may struggle through a kind of organized chaos.
This guide shows you what IPD changes inside a headset, how to get an accurate IPD measurement, and how to test your setting without confusing lens alignment with strap fit. You will also learn when blur is normal, when your hardware may be limiting you, and when discomfort calls for a break or professional advice. The goal is simple: clearer images, less eye work, and longer sessions that still feel comfortable when you remove the headset.
Measure pupil center to pupil center in millimeters, repeat the reading three times, and use a professional measurement when home results disagree.
Start with your measured distance, then center the headset vertically and horizontally before tightening the straps.
Use a still, high-contrast menu to test clarity and adjust in 1 mm steps when your headset supports fine control.
Check the supported IPD range and adjustment method for the exact headset model, hardware revision, and current software version.
Stop when you experience persistent blur, double vision, eye pain, nausea, or headache; seek eye-care advice when symptoms continue.
Interpupillary Distance Explained for Headset Comfort
IPD is the distance in millimeters between the centers of your pupils. Matching that measurement to your headset helps each eye meet the clearest part of its lens—reducing blur, squinting, fatigue, and headache risk.
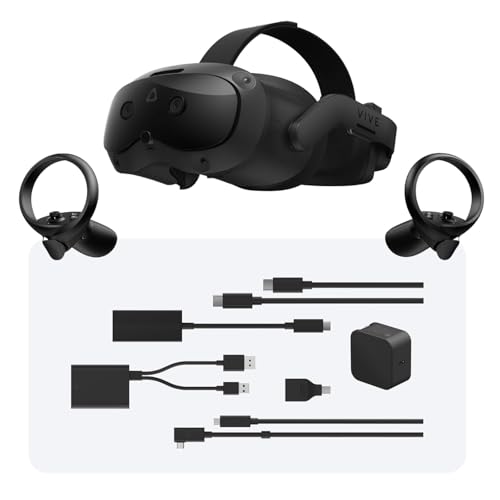
HTC Vive Focus Vision Wired Bundle — XR Headset with DisplayPort PC VR Streaming Kit
All-In-One VR Solution: The VIVE Focus series offers standalone and PC VR experiences. Harness the power of virtual…
As an affiliate, we earn on qualifying purchases.
As an affiliate, we earn on qualifying purchases.
One measurement, three visual consequences
A headset uses IPD to place its optical centers in front of your eyes. Correct alignment lets both views settle together cleanly; a mismatch moves your pupils away from the lenses’ sharpest zones.
Find the sweet spot
Accurate positioning makes high-contrast menu text look sharper and reduces halos, smearing, and soft edges.
Merge both views
Each eye receives a slightly different image. Good alignment helps the brain combine them into a stable scene.
Reduce extra eye work
Removing optical mismatch can lower the effort associated with persistent refocusing and image fusion.
IPD spectrum at a glance
Illustrative adult reference / millimeters
Pupilometer Digital Pupillary Distance Meter Ophthalmic Measuring Tool
【High-Accuracy PD Measurement】: Our pupillary distance meter ensures precise and direct point-taking for reliable optometry results, with a…
As an affiliate, we earn on qualifying purchases.
As an affiliate, we earn on qualifying purchases.
Small displacement, accumulating effort
A setting only a few millimeters away from your measurement can move both eyes away from their ideal viewing positions. Your brain may compensate at first, which is why discomfort sometimes appears after twenty minutes rather than immediately.
IPD is mismatched
The lens spacing does not correspond to the centers of your pupils.
Sweet spots shift
Your eyes view the scene through less-optimal areas of the lenses.
Images resist fusion
Text softens, edges glow, or the two views feel harder to merge.
Symptoms build
Eye strain, headache, fatigue, nausea, or double vision may follow.
Straps + facial interface
Control pressure, stability, weight distribution, and how the shell rests on your face.
IPD + headset position
Control whether your pupils line up vertically and horizontally with the lens sweet spots.
DSLRKIT Lens Focus Calibration Tool Alignment Ruler Folding Card,Pack of 2
This compact ruler allows you to determine if your lens is auto-focusing accurately as it should. It is…
As an affiliate, we earn on qualifying purchases.
As an affiliate, we earn on qualifying purchases.
Measure, repeat, then verify
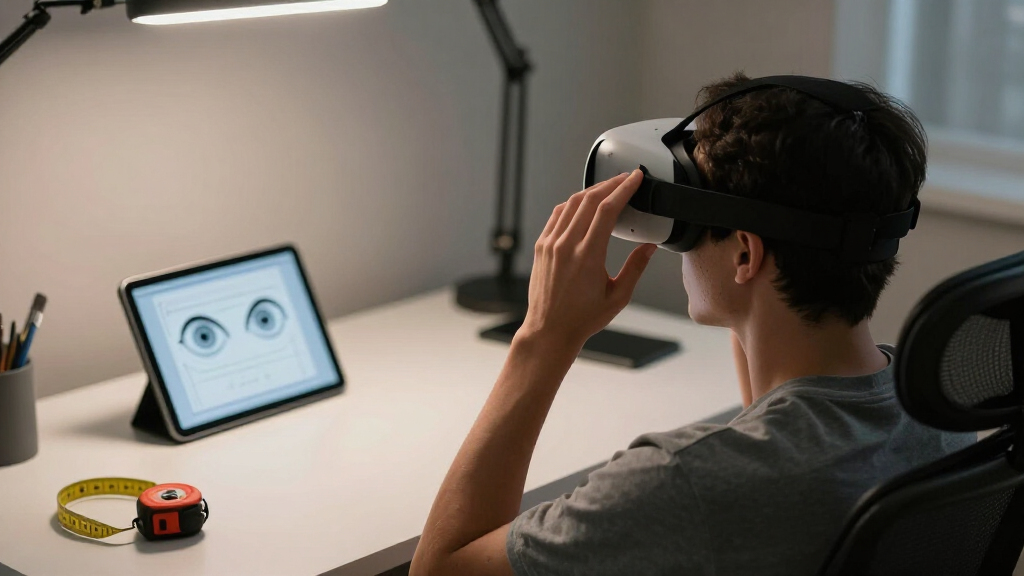
Use bright, even light and a millimeter ruler. Keep your face level and look straight ahead. The goal is pupil center to pupil center—not the distance between eyelids or the width of your glasses.
Stand about 20 cm from a mirror
Use even lighting and hold a millimeter ruler flat against your brow without touching your eyes.
Align zero with the left pupil
Close your right eye and place the 0 mm mark over the center of your left pupil.
Read the opposite pupil center
Open your right eye, close your left, and read the mark at the center of the right pupil.
Repeat the process three times
Keep the ruler steady. If results differ slightly, use the middle value rather than a shaky outlier.
Confirm results that disagree
Compare with a prescription or professional measurement when readings swing by four or five millimeters.
Distance versus near IPD: headsets generally use distance IPD because their optics make the display appear farther away than the physical screens. Check the exact headset manual when an app reports both values.
| Measurement method | Convenience | Confidence | Main watch-out | Best use |
|---|---|---|---|---|
| Mirror + millimeter ruler | ✓ High | ~ Moderate | Ruler movement or off-center reading | Fast starting estimate |
| Smartphone camera app | ✓ High | ~ App dependent | Camera angle and distance distortion | Quick repeated checks |
| Glasses prescription | ~ Varies | ✓ Strong | May list two monocular values | Add left + right values when appropriate |
| Optometric assessment | ✕ Appointment | ✓ Highest | Requires professional access | Disagreement or persistent symptoms |
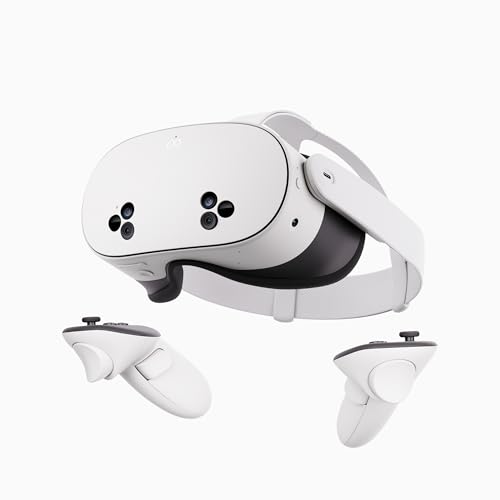
Meta Quest 3S 128GB | VR Headset — Thirty-Three Percent More Memory — Virtual Reality Without Wires — Access to 40+ Games with a 3-Month Trial of Meta Horizon+ Included (Renewed Premium)
NO WIRES, MORE FUN — Break free from cords. Game, play, exercise and explore immersive worlds — untethered…
As an affiliate, we earn on qualifying purchases.
As an affiliate, we earn on qualifying purchases.
Test optics before tightening everything
Begin with your measured IPD, then position the headset so both eyes are centered vertically and horizontally. A still, high-contrast menu is more useful for calibration than a moving game scene.
Center the shell
Move the headset gently up, down, left, and right until text appears clearest in both eyes.
Adjust in 1 mm steps
Move gradually when fine control is available. Pause after each change and let your eyes settle.
Tighten without shifting
Secure the straps only after finding clarity. Avoid pulling so tightly that the optical position changes.
| Adjustment design | Personal control | Typical advantage | Potential limitation |
|---|---|---|---|
| Manual slider or dial | ✓ Direct | Fast changes while wearing the headset | Scale precision varies by model |
| Stepped lens positions | ~ Limited | Simple, repeatable settings | Your exact IPD may fall between steps |
| Software-only adjustment | ~ Partial | Can alter rendered image placement | Cannot always move physical sweet spots |
| Eye-tracked automatic calibration | ✓ Automated | Rapid personalization for multiple users | Availability depends on hardware and software |
| Fixed-IPD optics | ✕ Minimal | Lower mechanical complexity | Comfort depends on lens tolerance and user IPD |
Blur is information—not a challenge to push through
IPD is only one comfort variable. Dry eyes, uncorrected vision, glare, low frame rate, motion design, tight straps, and front-heavy weight can produce similar symptoms.
Professional advice is the next step when symptoms continue.
Stop using the headset if discomfort persists after careful fit and IPD checks. Seek eye-care advice for ongoing blur, double vision, pain, nausea, or headaches.
What Your IPD Number Tells You About Headset Clarity
Interpupillary distance explained for headset comfort starts with one plain definition: IPD is the distance, in millimeters, between the centers of the pupils of your eyes. Your headset uses this measurement to place its optical centers where your pupils can see the clearest part of each lens, often called the sweet spot.
Think of binoculars at a scenic overlook. If their eyepieces sit too wide, you see dark crescents at the edges; too narrow, and the two circles refuse to merge cleanly. A VR or AR headset creates a more polished version of the same problem, using two displays or two rendered views to build one three-dimensional scene.
Your IPD is commonly written as one number, such as 63 mm. Some glasses prescriptions instead show two monocular values, perhaps 31 mm for the right eye and 32 mm for the left, because faces are not perfectly symmetrical. Add those values together and you get the binocular IPD used by many headsets.
The typical adult IPD often falls around 54 mm to 68 mm, though real human measurements extend beyond that band. A widely cited anthropometric review by Neil A. Dodgson reported a mean adult IPD close to 63 mm and documented a broader population spread [2]. An average can help hardware designers, but it cannot tell you where your own pupils sit.
If you search for what is interpupillary distance, remember that IPD is not the width of your glasses, your eye size, or the distance between the inner corners of your eyelids. You measure pupil center to pupil center. That small distinction matters when one millimeter on a ruler can move each lens away from its clearest zone.
Why the Wrong Setting Makes Your Eyes Work Overtime
Interpupillary distance explained for headset comfort comes down to alignment: a mismatched setting places the headset’s optical centers away from your pupils. Your eyes may then fight to merge two imperfectly positioned views, causing soft detail, double edges, eye strain, headache, or early fatigue during a longer session [1].
Imagine reading white menu text against a black space-station wall. At the correct setting, the letters look crisp and still. With the lenses several millimeters off, those same letters may wear pale halos, and you may keep nudging the headset as if a loose strap caused the blur.
The confusing part is that your brain can hide a mild mismatch for a while. It is a bittersweet talent: your visual system can fuse imperfect images, but that correction takes effort. You may enjoy the opening level and only notice the cost later, when your temples feel tight or ordinary room text takes a moment to settle after you remove the headset.
Physical fit and optical fit are different. Straps control pressure and stability; IPD controls lens alignment. A soft face cushion cannot correct an optical mismatch.
Correct alignment also supports convincing depth. Each eye sees the scene from a slightly different angle, and your brain combines those views into distance and shape. The goal is not merely a sharper menu: headsets align correctly so a nearby control panel feels near, a distant doorway feels far, and the scene does not wobble when your gaze moves.
IPD is only one piece of comfort. Dry eyes, uncorrected vision, low frame rate, glare, motion design, tight straps, and a front-heavy shell can produce similar symptoms. Correct IPD removes one source of strain; it does not make every game comfortable or turn unsuitable content into a safe experience.
How to Measure Your IPD at Home in Five Minutes
- Stand about 20 cm from a mirror in bright, even light.
- Hold a millimeter ruler flat against your brow without touching your eyes.
- Close your right eye and place the 0 mm mark over the center of your left pupil.
- Open your right eye, close your left, and read the mark at the center of your right pupil.
- Repeat the process three times and use the middle value if the readings differ.
You can measure IPD at home with a mirror and millimeter ruler by lining up zero with one pupil center and reading the position of the other. Keep your face level, look straight ahead, and repeat the reading. For higher confidence, compare your result with a glasses prescription or an eye-care professional’s measurement.
Suppose your three readings are 62 mm, 64 mm, and 63 mm. Use 63 mm rather than averaging a shaky outlier into the result. If the values swing by four or five millimeters, improve the light, steady the ruler, and ask someone to take a front-facing photo while you hold a bank card beside your forehead for scale.
A smartphone app can make the process quicker, but camera angle matters. A phone held below your nose can distort facial proportions like a fun-house mirror. Use the app’s stated distance, remove tinted glasses, face a window or soft lamp, and check whether the software reports distance IPD, near IPD, or both.
Headsets generally use distance IPD because their optics make the display appear farther away than the physical screens. Near IPD is usually smaller because your eyes rotate inward when you focus on something close. If an app gives you several figures, use the headset maker’s manual to identify the requested measurement.
A professional measurement with a pupillometer remains the strongest choice when home results disagree, your face is noticeably asymmetrical, or you use strong prescription lenses. You can ask for both binocular and monocular values. That takes guesswork out of the setting and gives you a useful baseline for future headsets.
Which IPD Adjustment Gives You the Best Starting Point?
| Adjustment type | What you control | Best practical use | Main limitation |
|---|---|---|---|
| Continuous mechanical | You slide or turn the lenses through a range. | Fine tuning around an exact value such as 61.5 mm. | The displayed number may not match lens position perfectly. |
| Stepped mechanical | You choose from two or three fixed lens positions. | Quick sharing when each user fits one available position. | Your IPD may fall between steps. |
| Software-only | You change image rendering while lenses remain fixed. | Adjusting scale or stereo geometry on supported hardware. | It cannot move the physical sweet spot to your pupils. |
| Automatic calibration | Eye tracking estimates or applies a setting. | Fast user switching on compatible headset models. | Accuracy and lens movement vary by hardware and software version. |
The best adjustment gives your measured IPD a physical lens position inside the headset’s supported range. Continuous mechanical control offers the finest placement, stepped designs offer simplicity, and automatic systems offer speed. A software setting alone cannot fully replace lenses that physically line up with your pupils.
Take a user with a 59 mm IPD and a headset offering lens positions at 58 mm, 63 mm, and 68 mm. The 58 mm step provides the sensible starting point because it sits only one millimeter away. Yet comfort still depends on the lens design; a large sweet spot may tolerate that gap better than a lens with sharp central clarity and rapid edge blur.
Some modern headsets use eye tracking to estimate IPD or drive motorized lens movement. That can make a shared headset feel almost effortless: one person removes it, the next person puts it on, and calibration follows. Treat every claim as model-specific, since features can change across hardware revisions, software versions, regions, and firmware updates.
Wider adjustment ranges help people who sit outside the most common adult band, but the printed range does not tell the whole story. Lens shape, eye relief, prescription inserts, facial structure, and asymmetric monocular IPD can change how usable the endpoints feel. Range tells you eligibility; an actual fit test tells you comfort.
Before buying or sharing a headset, check its current manual for the supported range and adjustment type. Also follow the maker’s current age guidance, account rules, and safety instructions, since those vary by platform and region. IPD fit does not override an age rating or a device restriction.
How to Dial In a Clear Image Without Chasing Perfection
Interpupillary distance explained for headset comfort gives you a starting number, but the clearest setting comes from a controlled fit test. Enter your measured IPD, loosen the straps, center the headset vertically, and inspect small high-contrast text. Change one thing at a time so you can tell optical blur from poor positioning.
Use a still menu or calibration screen rather than a racing game. A stationary white grid on a dark background exposes colored fringes, double lines, and uneven focus without adding artificial motion. If the center sharpens when you push the shell a few millimeters left, your headset may be sitting off-center rather than using the wrong IPD value.
- Set the headset to your measured IPD.
- Hold the visor gently against your face before tightening any strap.
- Move the shell up, down, left, and right in tiny steps until center text looks sharp.
- Tighten the rear or upper support until the image stays still without squeezing your temples.
- Try IPD changes of 1 mm at a time, pausing long enough to compare clarity.
- Test for 10 to 15 minutes, then stop and check how your eyes and head feel.
Do not use strap tension as a substitute for alignment. Cranking the side straps can pin the sweet spot in place, but it can also leave red marks, compress your temples, and pull the facial interface unevenly. Stable beats tight: let the upper strap or rear cradle carry weight where the design allows.
If you wear glasses or prescription inserts, test with the exact setup you plan to use. Inserts can alter eye relief, while thick frames can keep your eyes farther from the lenses. A setting that looks clean without correction may feel different once an insert adds several millimeters between your face and the optics.
Record the result for shared hardware. A simple note such as Alex: 60 mm, rear dial 3 saves repeated fiddling and keeps people from accepting someone else’s setup. The number is a map coordinate, not a trophy; the winning setting is the one that gives you a stable image without pain.
When Blur or Headache Means You Should Stop and Recheck
Stop your session when blur, double vision, nausea, eye pain, or a growing headache persists after a basic IPD and fit check. Discomfort is a stop signal, not a training challenge. Remove the headset, rest your eyes, and retry later with shorter sessions only after the symptoms have fully cleared.
For example, you may play comfortably for fifteen minutes but develop a dull ache behind one eye during a forty-minute session. Recheck the lens spacing, headset height, prescription setup, and software calibration. If one eye always looks sharp while the other remains hazy, a single binocular IPD number may not reflect your facial asymmetry.
Persistent symptoms deserve help from an eye-care professional, especially when discomfort also appears while reading, driving, or using ordinary screens. Bring your headset IPD setting and any home measurements to the appointment. A professional can check monocular pupil distances, your vision correction, and eye coordination without relying on guesswork.
Never push through double vision or eye pain. VR should not become an endurance contest between your eyes and the lenses.
Children and teenagers need extra care because their faces and IPD can change as they grow. Re-measure during growth phases, after a major prescription change, or whenever a once-comfortable setup begins to feel wrong. Follow the headset maker’s current age rating and safety guidance; those rules differ across devices, software stores, and regions.
Adults do not need to measure before every session. Recheck every few years, after new eyewear, when switching to a different headset, or when unexplained discomfort appears. According to skeldrift.com, correct alignment supports clearer images and can reduce the strain associated with a mismatched setting [1].
References: [1] skeldrift.com, Accessibility & Comfort guidance on IPD and headset fit. [2] Neil A. Dodgson, Variation and extrema of human interpupillary distance, published in the Proceedings of SPIE, 2004.
Frequently Asked Questions
Can I measure my IPD with a normal ruler?
Yes. Use a ruler marked in millimeters, stand near a mirror, and measure from the center of one pupil to the center of the other. Repeat the reading three times; if the numbers vary widely, ask someone to help or request a professional measurement.
Is my glasses prescription IPD the same number my headset needs?
It can be, provided the prescription lists distance IPD. Some prescriptions show two monocular values, such as 31 mm and 32 mm, which you can add for a 63 mm binocular IPD. Do not confuse that figure with near IPD, which is often smaller.
What if my IPD falls between two headset settings?
Start with the nearest available setting and compare the neighboring step using small, stationary text. Pick the position that keeps both eyes clear without strain. A broad lens sweet spot may handle a small gap, while a narrow one may expose blur sooner.
Can the correct IPD setting prevent VR motion sickness?
Correct IPD can reduce blur and visual strain, but it cannot remove every cause of motion sickness. Frame rate, artificial movement, latency, field of view, and personal sensitivity also matter. Stop when nausea begins and choose gentler movement settings when the software offers them.
How often should I measure my IPD again?
Adults can recheck every few years, after a new vision prescription, or when a previously comfortable headset starts causing trouble. Children and teenagers may need more frequent checks during growth. A new headset also deserves a fresh setup because lens design and adjustment ranges differ.
Conclusion
Your IPD number is the starting coordinate for comfortable headset use, not a setting you should guess once and forget. Measure it carefully, place the lenses at that value, and test with sharp text before you tighten the straps. A few calm minutes of setup can prevent an evening of blurred menus, tired eyes, and temple pressure.
Remember the central contrast: the straps fit the headset to your head, while IPD fits the image to your eyes. Get both right, and the hardware fades into the background. The virtual room stops looking like two projections fighting for space and becomes one steady place you can simply see.