TL;DR
Open a free Amazon Business account
Business pricing, bulk buying and tax-exempt orders.
Create a free accountAs an affiliate, we earn on qualifying purchases.
Steam Frame comfort settings work best as a group: enable a visible boundary, choose teleport movement and snap turning, favor a stable refresh rate, and fit the headset before adjusting image controls. Change one option at a time, stop immediately when discomfort appears, and treat leaked or rumored setting names as unconfirmed until Valve documents them.
Your stomach can spot a bad VR setting before you know which menu caused it. One moment you are walking through a quiet stone corridor; the next, the walls glide while your body stands still, and a warm wave of nausea rises behind your eyes. That reaction does not mean you are bad at VR. It means your movement, visuals, or headset fit need attention.
This guide gives you a practical overview of the settings that shape comfort across SteamVR experiences, including boundaries, locomotion, turning, refresh rate, reprojection, brightness, height, and seated play. Menu names and available controls can change with your headset, SteamVR build, graphics driver, and individual game. A setting mentioned in a leak or rumor remains unconfirmed until Valve or the relevant developer documents it.
You will also learn a simple way to test changes without spending an evening guessing. Start with a calm experience, keep the first session to roughly 10 to 15 minutes, and adjust only one variable between attempts. Your goal is not to endure discomfort. Your goal is to create a quiet, believable link between what your eyes see and what your body feels.
Trace SteamVR Chaperone around the space you can actually use, leaving furniture, pets, cables, and fragile objects outside the boundary.
Begin with teleport movement, 30-degree snap turning, low acceleration, and camera shake disabled; loosen one setting at a time.
At 90 Hz, each frame has about 11.1 milliseconds to render, so stable frame timing deserves priority over sharper shadows or higher resolution.
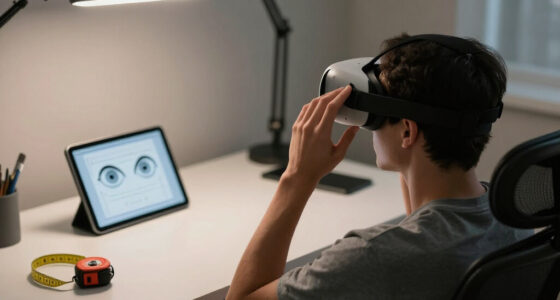
Fit and center the headset before changing image quality, since poor lens alignment can make clear graphics look blurred.
Use 10-to-15-minute test sessions and stop immediately when nausea, dizziness, sweating, headache, or eye strain appears.
Steam Frame Comfort Settings New VR Users Should Understand
Comfort comes from alignment: a trustworthy boundary, predictable movement, steady frame timing, and a correctly fitted headset. Start gently, change one option at a time, and stop when your body says something is wrong.
Set the room before the software.
SteamVR Chaperone defines the tracked play area, but it cannot detect every chair, cable, pet, child, or newly placed object. Trace the space you can safely use—not the room’s full outline.
Trace around hazards
Keep furniture, televisions, ceiling fans, fragile objects, and hard corners outside the visible boundary. Leave an extra arm-length margin when space allows.
Calibrate true height
A misplaced virtual floor makes objects feel unnaturally high or low. Recalibrate after moving tracking equipment or changing between seated and standing play.
Add a secure mat
A flat, non-slip mat can tell your feet when you have drifted. It should grip the floor and have no folded edges that could become a trip hazard.
A glowing grid is a warning, not a wall. Before every session, clear loose cables, bottles, stools, toys, and rolling chairs, then slowly test controller reach on every side.
Begin with predictable motion.
Artificial movement can make the view travel while your inner ear reports that your body is stationary. Beginner settings should reduce this sensory conflict.
| Setting | Gentler starting choice | What you experience | Tradeoff |
|---|---|---|---|
| Movement | ✓Teleport | Point to a location and move without watching the full glide. | Less natural for fast exploration. |
| Turning | ✓30° snap | The view rotates in short, controlled steps. | Movement can feel less fluid. |
| Vignette | ✓Medium | Peripheral vision darkens during artificial movement. | Some edge detail is temporarily hidden. |
| Acceleration | ✓Low or fixed | Movement starts without a sharp visual surge. | Travel may feel slower. |
| Camera effects | ✓Off | No artificial head bob, shake, or cinematic sway. | Animation may feel less dramatic. |
Protect the frame budget.
Repeated missed frames may trigger reprojection or motion smoothing. These systems can soften a brief performance dip, but visible artifacts and uneven motion can still reduce comfort.
Each refresh has a deadline.
At 90 Hz, the system must prepare roughly ninety frames every second. A stable target is usually more comfortable than higher detail with repeated timing spikes.
Higher refresh, tighter timing.
Supported rates vary by headset. Select a rate your computer can maintain consistently in the experience you are actually playing.
Comfort is a connected system.
Fix the earliest physical cause before compensating farther down the chain. A poor fit, for example, can make excellent graphics appear blurred.
Clear space
Remove hazards and trace a truthful boundary.
Fit headset
Balance the strap and center the lenses.
Choose motion
Use teleport, snap turn, and low acceleration.
Stabilize frames
Reduce quality until timing stays consistent.
Test briefly
Change one variable and assess how you feel.
Use a repeatable 15-minute test.
Choose a calm, familiar environment. Keep movement and visual conditions similar between attempts so you can identify which change actually helped.
Observe, change, compare.
Fit before graphics. Center the headset and find the clearest lens position before adjusting resolution, brightness, or contrast.
Match physical posture. Select seated or standing mode and correct the virtual height when the experience supports it.
Lower demanding effects first. Reduce shadows, reflections, supersampling, or resolution when frame timing is unstable.
Use your own result. Another player’s tolerance is not a benchmark. The right setup leaves you feeling normal afterward.
Setting names and availability can vary. Your headset, SteamVR build, graphics driver, and individual game may expose different controls. Treat leaked or rumored “Steam Frame” settings as unconfirmed until Valve or the relevant developer documents them.
Build a Boundary That Stops Real-World Collisions
Steam Frame comfort settings should begin with an accurately traced play boundary, because physical confidence affects every movement you make in VR. Clear the floor, trace the usable space rather than the room’s full outline, and leave extra distance around walls, televisions, ceiling fans, pets, and hard furniture. Valve calls its SteamVR boundary system Chaperone [1].
Imagine playing an archery game beside a low wooden coffee table. You cannot see its sharp corner through the headset, and a boundary drawn through the table tells the software that the space is safe. Trace around the obstacle instead, and the glowing grid appears before your shin meets the wood.
Use a standing-only boundary when your room is narrow or cluttered. A small mat under your feet adds a useful physical signal: when your toes touch its stitched edge, you know you have drifted. The mat should lie flat and grip the floor, since a folded corner creates its own trip risk.
- Remove loose objects: move cables, bottles, stools, toys, and rolling chairs outside the marked area.
- Leave a safety margin: keep the virtual line at least one comfortable arm movement away from fragile objects when space allows.
- Test controller reach: slowly extend both arms while facing each side of the boundary before opening a game.
- Use the correct floor level: a misplaced virtual floor can make objects feel awkwardly high or low.
According to Valve’s SteamVR setup guidance, room calibration and Chaperone define the tracked play area [1]. They do not detect every chair, child, pet, or newly placed bag. Check the floor again whenever someone changes the room, even if your saved boundary still appears.
A bright virtual grid is a warning, not a wall. It cannot stop your hand, catch a falling controller, or move a sleeping dog.
As an affiliate, we earn on qualifying purchases.
Choose Movement Controls That Keep Your Stomach Calm
Steam Frame comfort settings for movement should start with teleport locomotion, snap turning, low acceleration, and a moderate vignette. These options reduce the amount of visual motion that your inner ear cannot confirm. You can loosen them later, but your first sessions should favor predictable movement over speed.
Teleporting moves you between fixed points without showing the entire glide. Snap turning rotates the view in steps, often 30 or 45 degrees, rather than sweeping the room across your vision. In a dungeon, that feels like a clean camera cut instead of standing on a slowly spinning serving tray.
| Setting | Gentler starting choice | What you experience | Tradeoff |
|---|---|---|---|
| Movement | Teleport | You point to a location and move there at once | Less natural for fast exploration |
| Turning | 30-degree snap | The view rotates in short steps | Movement can feel less fluid |
| Vignette | Medium strength | The edges darken while you move | You temporarily lose peripheral detail |
| Acceleration | Low or fixed speed | Movement begins without a sudden surge | Travel may feel slower |
| Camera effects | Off | No artificial head bob or camera shake | Animation may feel less dramatic |
A review by Rebenitsch and Owen describes visual motion, display delay, and sensory conflict as recurring factors in cybersickness [2]. That helps explain why artificial head bob can feel unpleasant: the camera bounces as if you are jogging, yet your feet remain planted on a quiet carpet. Turn off camera shake, vehicle sway, and smooth strafing when a game exposes those controls.
Do not copy another player’s comfort settings just because they stream six-hour sessions. One person may tolerate smooth turning immediately, while another needs several weeks of teleport movement. Your correct setting is the one that lets you remove the headset feeling normal, not the one that looks most advanced.
As an affiliate, we earn on qualifying purchases.
Keep Frame Timing Steady Before Raising Visual Quality
Steam Frame comfort settings cannot compensate for badly uneven frame delivery, so favor a stable refresh rate and consistent frame time before raising shadows, reflections, or resolution. At 90 Hz, each frame has about 11.1 milliseconds to render. Repeated misses make motion feel soft, delayed, or uneven.
Think about moving your hand past a row of bright white menu icons. With steady rendering, the icons slide smoothly like cards on polished glass. With unstable performance, their edges double or shudder, and your virtual hand seems to drag a fraction behind your real one.
Motion smoothing and reprojection can generate or reuse visual information when your computer misses the headset’s target rate. These tools can make a brief performance dip less jarring, but they may produce ripples around moving controllers or objects. They are a safety net, not permission to overload the GPU.
- Open a visually simple SteamVR environment and use the headset’s supported refresh rate.
- Check performance with your current SteamVR version, headset software, and graphics driver.
- Lower in-game shadows, effects, or render resolution if frame timing repeatedly misses the target.
- Move your hands, turn your head, and inspect straight edges for judder, doubling, or warping.
- Raise one visual setting only after the experience remains stable for a full test session.
Refresh-rate choices differ by headset and software version. A mode available on one SteamVR-compatible headset may not appear on another, and an update can alter reprojection behavior. Record the platform, headset, refresh rate, and app version when comparing performance claims online; without those details, a claim such as “runs perfectly” tells you very little.
For example, a flight simulator may need lower cloud detail to hold steady performance, while a plain rhythm game can run at higher resolution. Choose the setting that keeps head movement clean. A slightly softer cockpit is easier to accept than a crisp instrument panel that trembles every time you look left.
As an affiliate, we earn on qualifying purchases.
Fit the Headset So Clear Text Stays Clear
Better Steam Frame comfort starts with positioning the lenses in front of your eyes, setting the supported lens spacing correctly, and balancing the headset’s weight across your head. A blurred image is not always a graphics problem. Before touching render resolution, find the clearest lens position and adjust the straps around it.
Loosen the straps, hold the headset gently against your face, and move it a few millimeters up, down, left, and right. Watch a line of small text in the SteamVR menu. When the letters become sharp instead of glowing like wet chalk, keep the visor there and tighten the straps without crushing the foam.
If your headset offers an IPD or lens-spacing control, use your measured interpupillary distance when available. Do not force a physical control beyond its marked range. If you wear glasses, use the headset’s supported spacer or lens-clearance option so the frames do not scrape the VR lenses.
- Forehead pressure: rebalance the top strap before tightening the side straps.
- Cheek pressure: raise the rear support slightly and check whether the visor sits too low.
- Blur on one side: center the headset and confirm that the facial interface is seated evenly.
- Heat and damp foam: pause, wipe the interface with a material-safe cloth, and let it dry.
A common first-session mistake is tightening every strap until the headset feels clamped in place. Ten minutes later, a hot band forms across your forehead and the foam feels damp against your skin. Secure does not mean painful; the headset should resist slipping when you turn, while your jaw and temples remain relaxed.
Check the manufacturer’s current cleaning and fit instructions for your exact hardware. Facial interfaces, coatings, spacers, and adjustment ranges differ between models. A third-party strap may also shift the balance, so repeat the fit process after changing any physical accessory.
As an affiliate, we earn on qualifying purchases.
Match Height, Seating, and Controls to Your Body
Comfort settings for seated and standing play should match your real posture, reach, floor level, and mobility. Recenter the view after sitting down, select a seated mode when the app offers one, and place frequent controls within an easy range. Good calibration prevents repeated stretching, crouching, and shoulder strain.
Suppose you start a cockpit game while seated, but the software still uses yesterday’s standing height. The dashboard may appear near your knees, forcing you to crane your neck toward floating controls. A quick recenter or seated-height adjustment brings the switches back to chest level, where your hands can reach them naturally.
For standing play, confirm that the virtual floor aligns with the real one. Set one controller on the floor during calibration if the setup process asks you to identify ground level. When the virtual floor floats several centimeters too high, picking up objects can send your controller into the carpet or a nearby table leg.
- Use seated mode for long conversations, cockpit games, creative tools, or any session where standing adds no useful interaction.
- Enable button turning if rotating your chair or body causes pain, cable tangles, or balance problems.
- Adjust holsters and reach when a game lets you move waist items, tool belts, or inventory slots.
- Use subtitles and audio controls when dialogue competes with loud effects or directional sound is hard to follow.
This setup is suitable for a new VR user who wants a controlled first session, but accessibility needs vary widely. Someone with limited shoulder movement may need shorter reach distances; someone with balance concerns may prefer a stable chair with no wheels. Test each action slowly before a game starts firing arrows, alarms, or enemies at you.
Comfort controls do not replace a game’s age rating, content warnings, or guardian settings. Check the rating for the exact platform and release because ratings can differ by region or version. A physically comfortable setup can still present frightening scenes, flashing effects, or online voice chat that may not suit every player.
Use a 15-Minute Test to Find Your Personal Settings
Understanding Steam Frame comfort settings becomes much easier when you test one change during a short, repeatable session. Use the same calm app for about 10 to 15 minutes, note how you feel before and after, and stop at the first sign of nausea, dizziness, headache, sweating, or unusual fatigue.
Start in a cool room with water nearby and a clear path to a chair. Pick a scene with simple movement, such as a quiet training room rather than a racing game. The soft hum of a menu space and a fixed horizon give you a cleaner test than a car sliding sideways through flashing city lights.
- Set your baseline: enable Chaperone, teleport movement, snap turning, and a comfortable headset fit.
- Play briefly: remain in the same low-intensity experience for no more than 15 minutes.
- Stop early: remove the headset as soon as symptoms begin; do not wait for them to become strong.
- Change one setting: adjust only turning angle, vignette strength, movement type, brightness, or graphics quality.
- Retest later: return only after you feel completely normal, using the same scene when possible.
For example, if you change smooth turning, brightness, and render resolution together, a better session tells you nothing about which change helped. If you switch only from smooth turning to 30-degree snap turning, the result is clear. Keep a short note such as “12 minutes, snap turning, no nausea, slight forehead pressure.”
Research on cybersickness reports that symptoms vary with the user, task, display, and exposure conditions [2]. That is why another person’s “best settings” should serve as a starting point rather than a prescription. Your comfort can also change when you are tired, hungry, overheated, ill, or returning after several weeks away.
Never train through nausea. Stop, sit somewhere cool, drink water, and wait until you feel fully normal before deciding whether to try VR again.
Seek medical advice if symptoms are severe, persist after the headset comes off, or involve fainting, chest pain, weakness, or a new vision problem. A settings guide cannot diagnose a medical issue. Your immediate job is simple: remove the headset and return to a stable real-world view.
Frequently Asked Questions
What Steam Frame comfort settings should a beginner use first?
Start with Chaperone enabled, teleport locomotion, 30-degree snap turning, low acceleration, and camera shake disabled. Use the headset’s supported default refresh rate and lower graphics settings if performance stutters. That group gives you a calm baseline before you test more fluid movement.
Should I enable motion smoothing in SteamVR?
Motion smoothing can soften brief frame-rate drops, but it may create warping around hands and moving objects. Use it as support while you lower demanding graphics settings, not as a substitute for stable rendering. Its behavior depends on your headset, GPU, driver, SteamVR build, and game.
Why do I still feel sick when I use teleport movement?
Teleport movement removes continuous forward motion, but smooth turning, camera shake, unstable frame timing, heat, or poor headset fit can still cause discomfort. Try snap turning, disable head bob, check performance, and shorten the session. Stop immediately if symptoms begin rather than waiting to see whether they pass.
How often should a new VR user take breaks?
For your first sessions, test VR for roughly 10 to 15 minutes and take the headset off while you still feel well. You can extend later sessions gradually if you remain comfortable. A timer helps because an immersive game can make 30 minutes feel like five.
Can I use SteamVR comfortably while seated?
Yes, many SteamVR experiences support seated play, view recentering, button turning, and adjustable height. Use a stable chair, clear the controller area, and keep the virtual floor calibrated. Check the individual game’s store page and settings because seated support differs by title and version.
Conclusion
Your best starting setup is simple: a clear boundary, teleport movement, snap turning, steady performance, and a balanced headset. Test it in a calm experience for 10 to 15 minutes, then change only one option before the next session. That method gives you useful answers instead of a confusing pile of guesses.
Remember the signal that matters most: you should leave VR feeling like yourself. If the floor seems to sway, your stomach tightens, or the room feels strangely distant, stop and let your senses settle. The best session ends with you lifting the visor to a quiet, solid room—and feeling ready to return another day.
NFL season / tailgating Picks
team gear
As an affiliate, we earn on qualifying purchases.