
TL;DR
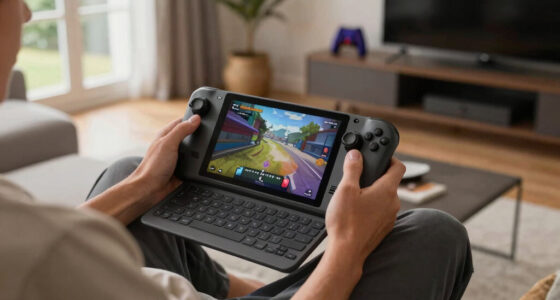
Steam Deck Recording Options Explained Before You Capture Gameplay means choosing between Steam Game Recording, OBS, and a capture card before you start playing. Use Steam’s built-in recorder for quick clips, OBS for overlays and audio control, and external capture hardware for long sessions or clean 1080p60 footage. Test one 30-second clip first so you catch frame drops, muffled mic audio, and storage problems early.
You land the parry, the boss health bar melts, and the Steam Deck fan gives that tiny hair-dryer whine in your hands. Then you remember you never set up recording. The moment is gone, except for the swear word hanging in the room.
This guide shows you what to choose before you capture gameplay: Steam’s built-in recorder, OBS, or an external capture card. You’ll also see the settings that protect frame rate, storage, audio, and sharing rules so your clip looks clean instead of crunchy.
Key Takeaways
- Decide first: Steam Game Recording is for fast clips, OBS is for overlays and audio control, and capture cards are for long docked sessions.
- For handheld play, 720p or 800p often matches the Deck’s 1280 x 800 screen better than heavy 1080p settings.
- At 12 Mbps, 10 minutes of 1080p60 video lands near 900 MB before audio and editing overhead.
- Performance claims need platform notes: SteamOS version, Deck model, FPS cap, preset, and current Deck Verified status.
- Mark leaks and rumors as unconfirmed, label spoilers, and respect age ratings when you share footage.

Guermok Video Capture Card, 4K USB3.0 HDMI to USB C Capture Card for Streaming, 1080P 60FPS, Compatible with iPad Mac OS Windows, Quest 3, OBS, PS5/4, Switch2/1, Xbox, Camera (Silver)
【1080P 60FPS Video Capture Card】 This HDMI game capture card is based on USB3.0 high speed transmission port,…
As an affiliate, we earn on qualifying purchases.
As an affiliate, we earn on qualifying purchases.
Pick The Capture Method That Matches Your Goal
Steam Deck Recording Options Explained Before You Capture Gameplay comes down to matching the tool to the job: Steam Game Recording for quick clips, OBS in Desktop Mode for layered scenes, or an external capture card for clean long sessions. Pick before the match starts, because changing mid-fight feels like tying shoes on a moving train.
| Option | Best for | Tradeoff | Real example |
|---|---|---|---|
| Steam Game Recording | Fast clips and background saves | Less control over scenes and audio tracks | Saving the last goal in Rocket League |
| OBS in Desktop Mode | Overlays, webcam, mic control, tutorials | More setup and more battery drain | Recording a guide with a camera box |
| External capture card | Long docked sessions and cleaner storage workflow | Needs a dock, cable, card, and another device | Recording a two-hour hunt or boss run |
If you only want the last clutch play, use Steam Game Recording. If you want a facecam, mic filters, browser alerts, or separate audio tracks, OBS gives you more knobs. If you want two hours of docked footage without touching the Deck, route HDMI through a capture card.

Digital Audio Workstation USB for Windows & macOS – Complete Music Production Suite with LMMS – 32/64-Bit Bootable Software with Setup Guide
Complete digital audio workstation software for music production, beat making, mixing, and sequencing.
As an affiliate, we earn on qualifying purchases.
As an affiliate, we earn on qualifying purchases.
Use Steam Game Recording For Fast Clips
Steam Deck Recording Options Explained Before You Capture Gameplay starts with Steam Game Recording because it gives you the shortest path from a wild moment to a saved clip. Valve’s recording feature supports manual recording and background capture on Steam Deck, and it works through the Steam Overlay for Steam games and supported non-Steam games [1].
Manual recording is the tidy notebook approach: you press record when you know something worth saving is about to happen. Background recording is the kitchen timer running behind you, quietly keeping the last slice of play so you can save it after the chaos. For a roguelike run, background mode catches the lucky build you did not know was about to happen.
Tip: Turn recording on in Steam Settings > Game Recording, then run a 30-second test in the exact game you plan to share.
Keep background recording shorter for casual play. A 5-minute rolling buffer is enough for a boss phase, a weird physics bug, or a last-second save, while a 30-minute buffer suits matches where the good part may arrive late.
Capture Card Nintendo Switch, 4K HDMI Video Capture Card, 1080P 60FPS, HDMI to USB 3.0 Capture Card for Streaming Work with Camera/Xbox/PS4/PS5/PC/OBS
【1080P HD High Quality】Capture resolution up to 1080p for video source and it is ideal for all HDMI…
As an affiliate, we earn on qualifying purchases.
As an affiliate, we earn on qualifying purchases.
Choose Settings That Keep The Game Smooth
Steam Deck Recording Options Explained Before You Capture Gameplay should keep one fact up front: the Deck’s handheld screen is 1280 x 800, so portable clips do not need 4K settings to look sharp. Valve lists Steam Deck OLED at 7.4 inches and up to 90Hz, while Deck LCD uses a 60Hz display [2].
On SteamOS 3 in Gaming Mode, frame-rate claims need context. Say the model, SteamOS version, display mode, in-game preset, FPS cap, and whether the game was Deck Verified on the day you tested it. A smooth 40 FPS clip of Baldur’s Gate 3 means more when you say it was Deck OLED, medium preset, 800p, and a 40Hz cap.
For most handheld footage, start with 720p or 800p and 30 FPS for heavy games, then raise quality only after the test clip looks stable. For lighter games like Hades or Stardew Valley, 60 FPS may look silkier without making the fan surge.

YWLRONG for Steam Deck Screen Repair Replacement for Steam Deck LCD Display Anti-Glare Screen Assembly Accessories Part with Repair Tools
Compatibility: The LCD display only for Steam Deck screen repair replacement(Not Included Touch Digitizer).Please make sure your model…
As an affiliate, we earn on qualifying purchases.
As an affiliate, we earn on qualifying purchases.
Plan Storage Before The Big Moment
Storage planning is simple math: bitrate times time equals the bite your clip takes out of the drive. According to YouTube Help, a 1080p60 SDR upload is recommended at 12 Mbps, while 720p60 is recommended at 7.5 Mbps [3]. That makes a 10-minute 1080p60 video roughly 900 MB before audio and editing overhead.
That number matters on a handheld where a single installed game can weigh more than 100 GB. You might have space for Cyberpunk 2077, an update, shader cache, and one long recording, then suddenly your Deck feels like a suitcase with the zipper straining.
- Use the internal SSD for short clips when you want fast access.
- Use a fast microSD card for batches of captures, then move them after the session.
- Delete failed test clips right away so they do not hide among your good takes.
- Leave several GB free before a long recording so game updates and shader files still have room.
A practical rule: if the clip is only for a Discord post, 720p is usually enough. If you plan to edit, crop, or upload to YouTube, record with a little more bitrate than the final upload needs so the image survives the second encode.
Set Up A Clean Clip In Five Minutes
A clean Steam Deck recording starts before the title screen: pick the mode, check audio, set storage, test the scene, and save a tiny sample. Do that once and your real clip has a much better chance of catching the glowing sword swing, the crowd noise, and the victory chime without stutter.
- Open Steam Settings > Game Recording and choose manual or background mode.
- Set the length of background capture to match the game: 5 minutes for short fights, 15-30 minutes for matches.
- Choose quality based on the game load, starting lower for big 3D games and higher for lighter 2D games.
- Check audio with headphones and mic if you plan to speak over the clip.
- Record 30 seconds, play it back, and look for dropped frames, hiss, or washed-out colors.
Try this with a real scene, not an empty menu. A Vampire Survivors screen full of flashing gems stresses the encoder more than a quiet pause screen, just like a crowded cafe tests a microphone better than a silent hallway.
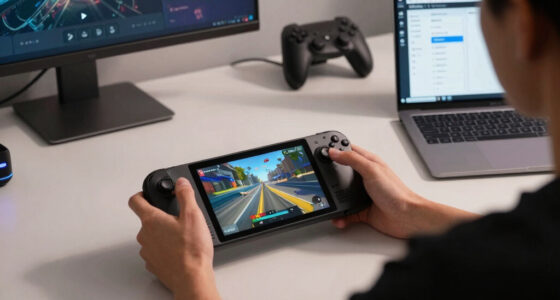
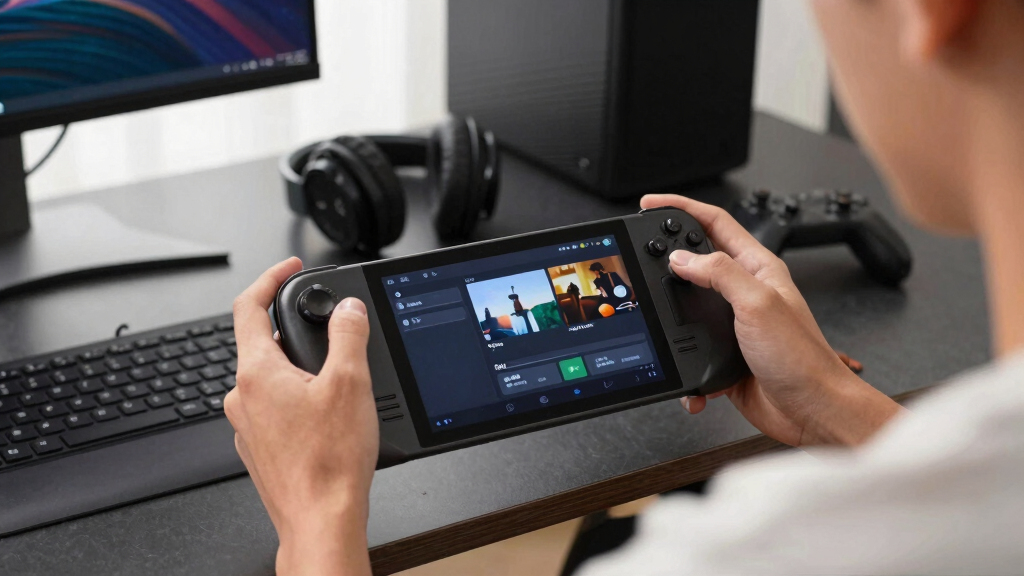
Use OBS Or A Capture Card For More Control
Steam Deck Recording Options Explained Before You Capture Gameplay gets more flexible when you leave the built-in recorder. OBS in Desktop Mode can add scenes, overlays, webcam sources, and separate audio controls, while an external capture card can record docked HDMI output on another PC so the Deck focuses on running the game.
OBS makes sense when your clip needs polish. Maybe you are filming a tutorial with a small camera box, a keyboard overlay, and your microphone on its own track. The tradeoff is friction: Desktop Mode, window capture quirks, power drain, and more setup than a quick overlay clip.
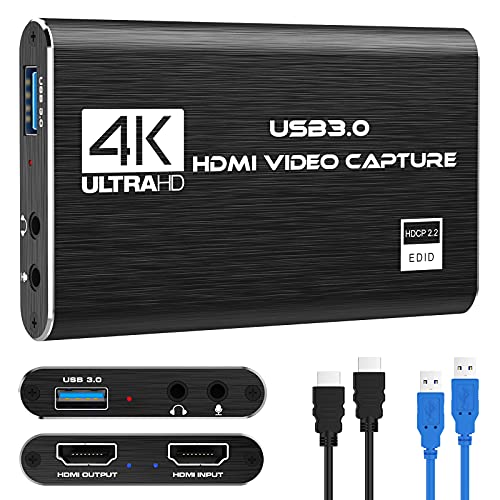
A capture card makes sense when the session is long or paid work. Dock the Deck, set the output to a capture-friendly resolution like 1080p60, and let the recording PC store the footage. Valve lists the Deck’s USB-C display output as supporting up to 8K at 60Hz or 4K at 120Hz, but your capture card, dock, cable, and game performance set the real ceiling [2].
For a two-hour Monster Hunter session, external capture feels calmer. Your Deck still gets warm, but the giant video file lands on the other machine instead of crowding the same storage your game needs.
Share Clips Without Spoilers, Leaks, Or Rating Surprises
Sharing a Steam Deck clip is publishing, even when it is just a short post to friends. Label spoilers, respect embargoes, treat rumors and leaks as unconfirmed, and mention the platform details behind performance claims. A clip can travel faster than you expect, especially when it shows a hidden boss or unreleased build.
If you record a game with an ESRB Mature or PEGI 18 rating, do not strip away the context when you post it to a mixed audience. A brutal finisher, loud profanity, or horror jump scare still carries that rating flavor in a 20-second clip.
Be plain when footage is not final. If a beta build stutters or a leaked menu appears online, call it unconfirmed unless the developer or publisher has confirmed it. That protects your credibility and keeps readers from treating foggy hallway footage as a finished game.
Also watch usernames, voice chat, and private messages. Before you upload, scrub the frame like you are cleaning a window: names, invite codes, and notifications are the smudges most people miss.
Frequently Asked Questions
Can I record gameplay on Steam Deck without extra software?
Yes. Steam Game Recording gives you built-in manual and background capture on Steam Deck through Steam settings [1]. It is the best first stop for short clips because you do not need a second PC, a camera, or Desktop Mode.
Will recording hurt FPS on Steam Deck?
Recording can lower FPS or battery life, but the impact depends on the game, SteamOS version, Deck model, and quality setting. On SteamOS 3, test in the exact scene you want to record; a quiet menu tells you little about a crowded fight with smoke, particles, and voice chat.
Should I record Steam Deck gameplay at 720p, 800p, or 1080p?
Use 720p or 800p for handheld clips and 1080p when docked or when you plan to edit for YouTube. YouTube recommends 12 Mbps for 1080p60 SDR uploads and 7.5 Mbps for 720p60, so higher resolution also means larger files [3].
Can I stream from Steam Deck instead of recording?
Yes, but recording is usually easier than streaming from the Deck itself. For a stream with alerts, camera, and chat, OBS or a capture card setup on another PC is cleaner because the Deck can spend more power on the game.
Where did the specs and bitrate numbers come from?
The recording feature details come from Valve’s Steam Game Recording page and reporting on its stable release [1][4]. Steam Deck hardware numbers come from Valve’s tech specs [2], and upload bitrate targets come from YouTube Help [3]. Sources: [1] https://store.steampowered.com/gamerecording [2] https://www.steamdeck.com/en/tech [3] https://support.google.com/youtube/answer/1722171 [4] https://www.theverge.com/2024/11/5/24289138/steam-game-recording-now-available-all-users
Conclusion
The best recording option is the one that matches your goal before the moment happens: Steam Game Recording for fast saves, OBS for production control, and a capture card for long clean sessions. Test 30 seconds, check storage, and state your Steam Deck model and settings when you talk about performance.
Do that and your next clip will feel ready when the boss drops, the screen flashes gold, and the tiny handheld in your palms sounds like it caught lightning in a jar.