
TL;DR
Steam Deck screenshots are captured with Steam + R1, saved locally, and usually match the game’s current output resolution, often 1280×800 in handheld mode. You can view them through Steam, upload them to Steam’s screenshot library, or move them through Desktop Mode, a microSD card, or a connected PC. For creators, the cleanest results come from using photo mode, hiding HUD elements, and capturing at the highest practical settings for the game.
Your best Steam Deck moment can vanish in less than a second: a boss frozen mid-swing, neon rain streaking across a city street, your character standing on a cliff while the sky burns orange.
This guide explains how screenshots work on Steam Deck, where they go, how to share them, and how you can make them cleaner for posts, guides, thumbnails, or personal archives. Think of it as Steam Deck screenshots explained for players who want memories and creators who need usable image files.
Steam Deck Screenshots Explained for Players and Creators
TL;DR: press Steam + R1 to capture the moment. The image is saved locally, usually mirrors the game’s current output resolution, and can be viewed in Steam, uploaded, or moved through Desktop Mode, microSD, USB-C, or a connected PC.
How the Shot Happens
The built-in shortcut works like a camera shutter for games. Timing matters: press both controls cleanly, wait for the notification or sound cue, then manage the image when the action settles.
Press Steam + R1
The quickest way to grab a rare boss pose, funny physics moment, or perfect landscape without digging through menus.
What you see is what it saves
Resolution, HUD, overlays, graphics settings, and docked display choices can all shape the final file.
Clean the frame first
Hide HUD elements, use photo mode, raise practical settings, and capture several frames before choosing the sharpest one.
Frame the moment
Wait for readable lighting, clear subject placement, and fewer distracting overlays.
Press the shortcut
Use Steam + R1 in Game Mode, or customize controls if the default feels awkward.
Review in Steam
Open the game page, media area, or screenshot library to favorite, delete, or upload.
Export if needed
Use Desktop Mode, removable storage, or a PC connection for editing and batch control.
JSAUX 2-Pack Screen Protector for Steam Deck, Ultra HD Glass Protector 9H Hardness Easy to Install with Guiding Frame Scratch Resistant Tempered Glass for Steam Deck OLED, Come with Toolkits
Both for Steam Deck LCD & OLED: JSAUX Full-screen coverage 7-inch tempered glass screen protector compatible with Steam…
As an affiliate, we earn on qualifying purchases.
As an affiliate, we earn on qualifying purchases.
Pick the Method That Matches the Goal
A quick memory and a guide thumbnail do not need the same workflow. Steam is fastest for sharing inside the ecosystem; Desktop Mode gives creators file control.
| Goal | Best Method | Speed | File Control | Why It Works |
|---|---|---|---|---|
| Save a funny or rare moment | Steam + R1 | ✓ High | ~ Basic | Built in, reliable, and ready during play. |
| Post to Steam community | Steam screenshot uploader | ✓ High | ~ Moderate | Keeps the image tied to the game and your Steam account. |
| Edit for a guide or thumbnail | Desktop Mode export | ~ Medium | ✓ Strong | Lets you rename, crop, annotate, and preserve originals. |
| Move many screenshots to a PC | microSD, USB-C, or network transfer | ~ Medium | ✓ Strong | Better for batches than sending one image at a time. |
| Publish rumors or beta visuals | Labeled export | ✗ Slower | ✓ Strong | Clear labels reduce confusion around version-specific images. |

SANDISK 1.5TB Ultra microSDXC UHS-I Memory Card with Adapter – Up to 150MB/s, C10, U1, Full HD, A1, MicroSD Card – SDSQUAC-1T50-GN6MA
Compatible with Nintendo-Switch (NOT Nintendo-Switch 2)
As an affiliate, we earn on qualifying purchases.
As an affiliate, we earn on qualifying purchases.
Quality Depends on the Scene
Steam Deck screenshots usually preserve detail well, but clarity is still shaped by resolution, motion, lighting, HUD clutter, and whether the game is handheld or docked.
Creator Checklist
A strong screenshot reads instantly at phone size. The subject should be clear, the crop should protect the important detail, and the file should be easy to find later.
- Capture multiple frames during action, then keep the sharpest image.
- Use docked output when a game can render higher and detail matters.
- Delete duplicate blurry explosions before they eat storage.
- Label leaks, beta captures, mods, and version-specific visuals clearly.

Anker Steam Deck Dock, Docking Station for Steam Deck (OLED)/ROG Ally/Legion Go, 6-in-1 USB C Hub with HDMI 4K@60Hz, 1Gbps Ethernet, 2 USB-A and 1 USB-C Port, 90W Fast Charging (Not for Rog Ally X)
6-in-1 USB-C Hub: Connect, charge, and play without limits thanks to a 100W PD-IN port for fast charging,…
As an affiliate, we earn on qualifying purchases.
As an affiliate, we earn on qualifying purchases.
Players Need Memories. Creators Need Files.
The same capture button serves two audiences. Players want the moment saved fast; creators need image files that survive cropping, posting, annotation, and comparison.
Capture, upload, move on
For a funny hat, a rare drop, or a wild match result, do not overwork the workflow. Grab the screenshot, review it in Steam, and share it where it belongs.
Stage the image before capture
For guides, thumbnails, and blog visuals, hide clutter, make text readable, preserve originals, and export through Desktop Mode when you need naming and editing control.
JSAUX 2-Pack Screen Protector for Steam Deck, Ultra HD Glass Protector 9H Hardness Easy to Install with Guiding Frame Scratch Resistant Tempered Glass for Steam Deck OLED, Come with Toolkits
Both for Steam Deck LCD & OLED: JSAUX Full-screen coverage 7-inch tempered glass screen protector compatible with Steam…
As an affiliate, we earn on qualifying purchases.
As an affiliate, we earn on qualifying purchases.
The Clean Sharing Chain
Think of the screenshot workflow as a chain. The fewer unclear steps you leave behind, the easier it is to find, edit, caption, and publish the right image later.
Key Takeaways
- Use Steam + R1 for the fastest Steam Deck screenshot in Game Mode.
- A screenshot reflects the game’s current display and render setup, so handheld and docked captures can differ.
- Use Steam’s screenshot tools for quick sharing, and Desktop Mode when you need file control or editing.
- Creators should hide HUD elements, use photo mode, and capture several frames before choosing the cleanest image.
- Label rumors, leaks, beta captures, and version-specific visuals clearly before sharing them publicly.
How You Take a Steam Deck Screenshot Fast
- Press Steam + R1 while the game is running.
- Wait for the small capture notification or sound cue.
- Open your Steam screenshot library from the game page, media area, or Steam interface.
- Upload, delete, favorite, or move the image when you are ready.
Steam Deck screenshots are taken with the built-in shortcut Steam button + R1, which works in Game Mode across most titles. The trick is timing: press both buttons cleanly, then let the Deck catch the frame like a camera shutter snapping shut.
Say you are playing Elden Ring and a dragon fills the whole screen with red fire. Your thumb hits Steam, your index finger taps R1, and the Deck grabs the scene before the flame fades. No menu hunt. No pause screen ruining the shot.
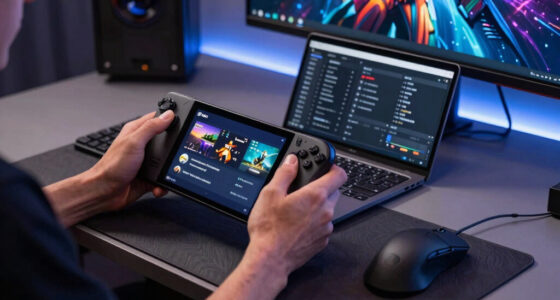
If a game uses unusual controls or the shortcut feels awkward, check Steam Input settings for that title. Custom layouts can make capture easier, especially if you use the Deck docked with a controller.
What Steam Deck Screenshots Actually Capture
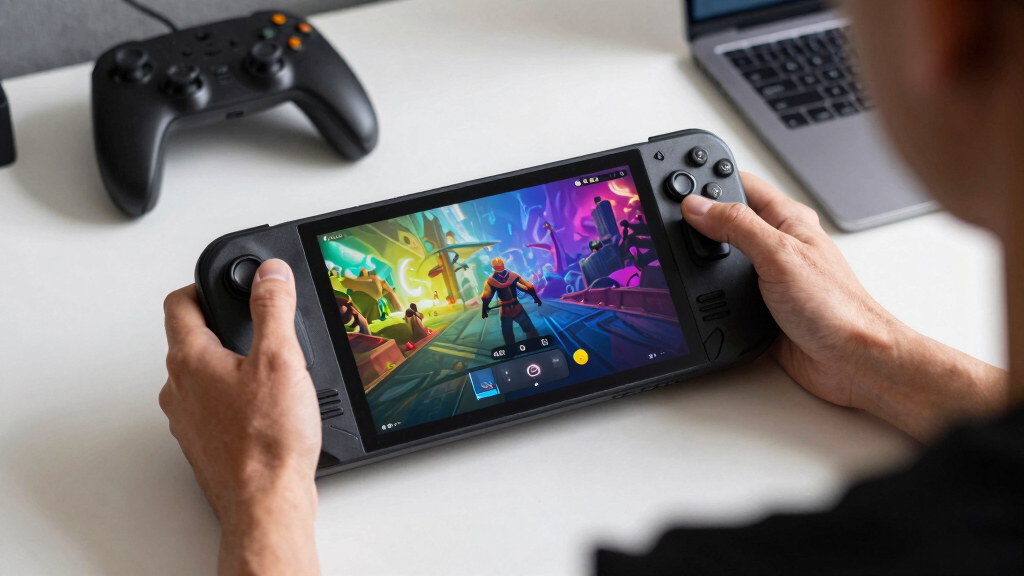
Steam Deck screenshots capture the game as it is being shown by Steam, including resolution, HUD, overlays, and visual settings active at that moment. In handheld play, that often means a 1280×800 image, because the Steam Deck LCD and OLED screens use that 16:10 resolution [1].
That detail matters. A cozy farming game may look crisp and soft on the Deck screen, but the same image can look smaller when you post it on a 4K monitor. The screenshot did its job; the canvas was just compact.
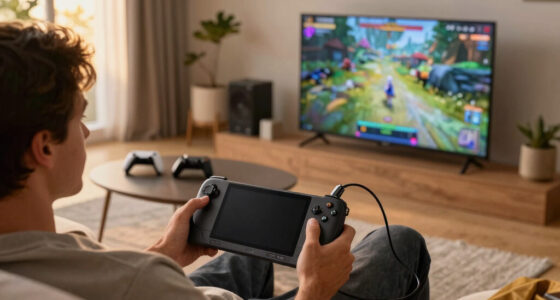
When you dock the Steam Deck to a TV or monitor, some games can render higher than 1280×800 if your settings allow it. A screenshot from a docked 1080p session may carry more detail than the same scene captured in handheld mode.
Key idea: a screenshot is not magic upscaling. It is a record of the game’s current visual setup, frozen at the moment you press the shortcut.
Where Your Screenshots Go After You Take Them
Steam Deck screenshots are stored locally first, then you can view and manage them through Steam’s media and screenshot tools. They do not instantly become social posts; they sit on the device until you upload, move, or delete them.
In Game Mode, start from the game’s page or your media area and look for screenshots tied to that title. It feels like flipping through a small photo album: one tab for the game, one row of captured moments, each frame waiting for a caption or a cleanup.
In Desktop Mode, screenshots live inside Steam’s file structure, which can be less friendly at first glance. The folders use Steam app IDs, so Hades or Balatro may appear under numbers rather than names. If that feels like opening a filing cabinet in the dark, use Steam’s screenshot manager first, then reveal the file location from there.
- Game Mode: best for quick viewing, deleting, and uploading.
- Desktop Mode: best for copying files, editing, renaming, or moving batches.
- microSD card or USB-C drive: best when you want to hand files to another device.
Which Screenshot Method Fits Your Goal Best
The best Steam Deck screenshot method depends on what you want next: a quick memory, a clean social post, or an editable file for a guide. Steam’s built-in capture is fastest, while Desktop Mode and external tools give creators more control.
| Goal | Best Method | Why It Works |
|---|---|---|
| Save a funny or rare moment | Steam + R1 | Fast, built in, and reliable during play. |
| Post to Steam community | Steam screenshot uploader | Keeps the image tied to the game and your Steam account. |
| Edit for a guide or thumbnail | Desktop Mode export | Lets you rename, crop, and process files with desktop apps. |
| Move many screenshots to a PC | microSD, USB-C drive, or local network transfer | Better for batches than sending images one by one. |
For example, if you are making a Steam guide about a tricky puzzle room, capture with Steam + R1, then move the best images in Desktop Mode. You can crop out clutter, add arrows in an editor, and keep the original untouched.
If you only want to show a friend the absurd hat your character found, do not overwork it. Capture, upload, share. Done.
How Creators Get Cleaner, Sharper Shots
Steam Deck screenshots look cleaner when you control the scene before you press the shortcut: hide the HUD, raise readable settings, wait for good lighting, and use in-game photo mode when available. Small choices can turn a busy frame into an image that reads instantly on Discord, Reddit, or a blog article.
A good screenshot behaves like a stage. The background steps back, the subject walks forward, and the light points your eye where it needs to go. A messy HUD, tiny text, and motion blur can crowd the frame like people talking over each other.
- Use photo mode when the game has one, especially for camera angle, depth of field, and character poses.
- Hide the HUD if the image is for a thumbnail, header, or clean comparison.
- Pause during bright moments rather than muddy darkness, unless the scene needs that mood.
- Capture multiple frames during action, then pick the sharpest one later.
- Check small text at phone size before posting a guide image.
Imagine capturing a build guide for Cyberpunk 2077 on Steam Deck. A menu screenshot with tiny stats may work for your archive, but a creator post needs readable numbers, strong contrast, and a crop that does not bury the useful part in the corner.
What Players Should Know About Quality and File Size
Steam Deck screenshots are usually saved as image files designed to preserve detail, and their size depends on resolution, color, and scene complexity. A dark cave wall may produce a smaller file than a confetti-filled victory screen packed with particles, lights, and UI.
Steam has long used PNG-style screenshot storage for high-quality captures in its screenshot system [2]. PNG keeps hard edges and interface text sharp, which helps when you capture settings menus, maps, inventory screens, or tutorial prompts.
The tradeoff is storage. If you take hundreds of shots across a 64 GB, 256 GB, 512 GB, or 1 TB Steam Deck model, screenshots can become digital pocket lint: harmless one by one, annoying in a pile. Clean them out after big games, especially if you also install large titles on internal storage.
Simple rule: if a screenshot helps you remember, share, teach, or compare something, keep it. If it is the same blurry explosion five times, delete four.
How to Share Screenshots Without Making a Mess
Steam Deck screenshots can be shared through Steam, copied in Desktop Mode, moved through removable storage, or transferred to another device for editing. The cleanest route depends on where the image needs to end up: Steam profile, social feed, article draft, or video editing folder.
- For Steam sharing, open the screenshot in Steam and upload it to your account.
- For Discord or Reddit, export the file first so you can crop or rename it before posting.
- For guides, create a folder by game and date, such as Deck screenshots – Stardew – Spring guide.
- For videos, move images to your PC and keep originals separate from edited versions.
A creator making a “best settings” post might capture the same scene at low, medium, and high presets. Naming those files clearly saves pain later: witcher3-medium-40fps-town.png tells you more than a random Steam file number.
Do not treat unconfirmed leaks, datamined images, or private beta screenshots as verified public material. If you share rumored content from a game build, label it unconfirmed and include the platform and version when you know them.
When Screenshot Problems Are Easy to Fix
Most Steam Deck screenshot problems come from timing, storage, sync settings, or confusion between Game Mode and Desktop Mode. If the shortcut does not seem to work, test it in a different game before you blame the Deck.
Start simple. Press Steam + R1 on the home screen or in a lightweight game, then check the media area. If that works, the issue may be the game, controller layout, or timing during a cutscene.
- No screenshot appears: try the shortcut again, then restart Steam if the media view looks stale.
- The shot is blurry: disable heavy motion blur or capture when the camera stops moving.
- The wrong image size appears: check whether you played handheld, docked, or with scaling enabled.
- You cannot find files: use Steam’s screenshot manager before digging through Desktop Mode folders.
- Uploads fail: check your network and Steam status, then try again later.
One common scenario: you capture a perfect racing finish, open your library, and see nothing. Then, five minutes later, it appears after Steam catches up. Annoying, yes. Usually not lost forever.
Why Screenshots Matter More on a Handheld PC
Steam Deck screenshots matter because the device lives between console comfort and PC flexibility. You can capture a couch-play moment in seconds, then treat the file like any other PC image when you need to edit, archive, or publish it.
That hybrid nature is the Deck’s quiet superpower. It lets a player save a cozy scene from bed, while a creator later opens the same file in a desktop editor with a mouse, keyboard, and a proper monitor. Soft blanket one minute, production desk the next.
There is a tension here: handheld screenshots feel casual, but creator work demands order. The fix is a tiny habit. After each game session, keep the best few, delete the clutter, and move anything useful into a named folder.
For age-rated games, match your sharing context to the content. A screenshot from an M-rated horror game with gore may be fine in your private folder, but it needs care on public feeds, community hubs, or posts aimed at younger readers.
Frequently Asked Questions
How do you take a screenshot on Steam Deck?
Press Steam + R1 while the game is open. You should see or hear a capture cue, then you can find the image through Steam’s media or screenshot area.
Are Steam Deck screenshots high quality?
Yes, but they depend on the game’s current output. In handheld mode, many captures are based around the Deck’s 1280×800 screen resolution, while docked play may allow higher-resolution shots in some games.
Can you move Steam Deck screenshots to a PC?
Yes. You can upload through Steam, copy files in Desktop Mode, use a microSD card, connect removable storage, or transfer files over your local network.
Can creators edit screenshots on the Steam Deck?
Yes. Desktop Mode lets you use Linux-compatible image tools for cropping, annotation, resizing, and file organization. For heavier editing, many creators move screenshots to a desktop PC.
Do Steam Deck screenshots include performance overlays?
If an overlay is visible on screen when you capture, it may appear in the screenshot. For clean creator images, turn off performance overlays, hide the HUD when possible, and capture the same scene again.
Conclusion
Remember one thing: a Steam Deck screenshot is only as useful as the moment and settings behind it. Capture fast, clean up often, and move the best shots somewhere you can actually use them.
The next time a skyline glows, a boss collapses, or your character wears something ridiculous, do not let it disappear. Press Steam + R1 and pin that little spark of play to the wall.