
TL;DR
Play games included with Prime
Start a Prime free trial and play with Amazon Luna on your devices.
Start playingAs an affiliate, we earn on qualifying purchases.
The Steam Deck OLED setup steps new owners should not skip are updating SteamOS, signing into Steam, checking cloud saves, setting storage rules, tuning the OLED display, and saving per-game performance profiles. Do those before your first huge download, and your Deck feels faster, cleaner, and easier to trust from day one.
A brand-new Steam Deck OLED can waste your first night if you treat it like a toaster: plug in, install game, hope.
The screen glows like black glass, the sticks feel ready, and your Steam library is right there. But the best first hour is not the flashiest one. This is an overview suitable for Steam and PC players who want a clean start, including important aspects such as updates, saves, storage, display settings, and battery life.
The Steam Deck OLED Setup Steps New Owners Should Not Skip
Update SteamOS, sign into Steam, check cloud saves, set storage rules, tune the OLED display, and save per-game performance profiles before your first huge download. That first careful hour makes the Deck feel faster, cleaner, and easier to trust from day one.
Plug in, update first, then install. Your first benchmark should not be running on yesterday’s firmware.
HDR OLED with up to 90Hz refresh rate.
Best protected by brightness and frame caps.
Enough time to update, test saves, and set defaults.
The checks that affect almost every session after.
A practical indoor brightness baseline for OLED.
Keep favorites and demanding games internal.
Do These Before the First Big Download
The early choices are not glamorous, but they prevent missing saves, muddy colors, weak Wi-Fi, and a battery that drains before the couch session gets good.
Charge While You Configure
Use the included charger so updates, formats, and installs do not stall halfway through.
Update Before Testing
Install system updates before judging performance, sleep behavior, frame pacing, or fan noise.
Confirm Your Library
Sign into Steam and verify purchases, friends, downloads, and cloud-supported games appear correctly.
Test Steam Cloud
Open a supported game and make sure a real save syncs before you leave your PC behind.
Format microSD on Deck
Let Gaming Mode prepare the card instead of guessing from a desktop file manager.
Tune the Screen
Start moderate, then test HDR only in games that handle dark scenes and highlights well.
Save Per-Game Profiles
Give demanding games a calmer cap and let lighter games breathe at higher refresh rates.
Sleep, Wake, Wi-Fi, Controls
A five-minute pass catches small annoyances before they become first-night frustration.
Baseline First, Judgment Second
SteamOS updates can touch stability, firmware, compatibility, and power behavior. Give the Deck a clean baseline before blaming a game.
Plug In
Stay on wall power so setup does not collide with a low battery warning.
Update
Open Settings, go to System, and install available SteamOS software updates.
Restart
Let firmware and system changes settle before launching a huge RPG.
Benchmark
Now judge fan hiss, frame pacing, shader setup, and sleep behavior.
Pick Storage Rules Before the Card Fills
The 512GB and 1TB OLED models give you breathing room, but modern PC games can still swallow a lot of space in one bite.
| Storage Choice | Best For | Setup Priority | Watch Out For |
|---|---|---|---|
| Internal SSD | Large favorites, shader-heavy titles, fast loading | ✓ Primary home | It fills quickly if every new game lands there by default. |
| microSD card | Indies, older games, emulators, backlog experiments | ~ Secondary library | Use a reputable card and format it through Gaming Mode. |
| External drive | Desktop Mode work, transfers, temporary libraries | ~ Desk-only helper | Less handy for handheld play away from a dock. |
| No storage plan | Impulse installs and messy cleanup later | ✗ Avoid | Big games bury the smaller titles you meant to sample. |
Balance OLED Pop Against Battery Life
Brightness, HDR, and frame-rate caps work as a pair. Start with the screen, then tune performance per game instead of forcing one global setup across your whole library.
The real-world test is your ears.
Play a demanding game uncapped for ten minutes, then set a frame cap. If the fan softens and the game still feels smooth, you found comfort without much compromise.
Fix Controls Once, Then Save the Layout
The Deck is a handheld and a tiny PC: trackpads, gyro, touch, back buttons, and Steam Input can make awkward games feel native.
Trackpad as Mouse
Use the right trackpad for tiny menus, map a back button to click, and save it to the game.
Gyro for Fine Aim
Add gyro only where it helps precision. Keep the layout simple enough to remember.
Keep Latency Lean
Favor stable frame pacing and familiar buttons over a clever layout you fight every jump.
Per-game profile sweet spot
Trace the Clean-Start Chain
SteamOS and firmware create the baseline.
One real test protects your campaign.
SSD for favorites, microSD for experiments.
Rich blacks without needless battery burn.
Each title gets the settings it deserves.
Key Takeaways
- Update SteamOS before testing performance so bugs, firmware changes, and compatibility fixes do not skew your first impression.
- Set brightness, HDR, and frame-rate caps early because the OLED screen and 50Wh battery work as a pair.
- Test Steam Cloud with a real save before relying on the Deck as your travel machine.
- Use the internal SSD for favorite and demanding games, then push experiments and older titles to microSD.
- Save per-game controls and performance profiles instead of forcing one setup across your whole library.
As an affiliate, we earn on qualifying purchases.
Do These 8 Setup Steps Before Your First Big Download
The Steam Deck OLED Setup Steps New Owners Should Not Skip are the choices that affect every session afterward: updates, sign-in, cloud saves, storage, display, controls, and battery. Do them before your first giant install, and you avoid missing saves, muddy colors, weak Wi-Fi, and a drained battery on the couch.
- Charge the Deck while setting it up. Use the included charger so updates and installs do not stall halfway through.
- Update SteamOS. Install system updates before judging game performance or sleep behavior.
- Sign into Steam. Confirm your library, purchases, friends list, and downloads appear correctly.
- Check Steam Cloud. Open a supported game and confirm saves sync before you swap between PC and Deck.
- Format your microSD card in Gaming Mode. Let the Deck prepare it instead of guessing from a desktop file manager.
- Tune the OLED display. Start with moderate brightness and adjust HDR only in games that support it well.
- Save per-game performance profiles. Give demanding games a battery-friendly cap and lighter games room to breathe.
- Test sleep, wake, Wi-Fi, and controls. A five-minute check catches the annoying stuff early.
Think of it like setting up a new bike before the first ride. You can pedal away immediately, but checking the brakes, seat height, and tire pressure makes the whole trip smoother.
Steam Deck OLED display calibration tool
As an affiliate, we earn on qualifying purchases.
As an affiliate, we earn on qualifying purchases.
Update SteamOS Before You Judge Performance
The Steam Deck OLED Setup Steps New Owners Should Not Skip should begin with SteamOS updates because Valve patches stability, compatibility, and power behavior after hardware ships. A handheld can feel rough for the wrong reason if you test a game before fixes land. Update first, then judge the fan hiss, frame pacing, and sleep behavior.
Open Settings, go to System, and install available software updates before loading a huge RPG. Valve regularly ships Steam Deck software updates that fix bugs and improve compatibility across SteamOS, firmware, and game behavior [2]. That means your first benchmark should happen after the machine has caught up.
A practical example: if a game stutters during shader setup on the first launch, you want to know the game caused it, not an old system build. Give the Deck a clean baseline. Then your troubleshooting has fewer shadows in it.
Steam Deck OLED battery protection accessories
As an affiliate, we earn on qualifying purchases.
As an affiliate, we earn on qualifying purchases.
Make the OLED Screen Look Rich Without Eating Battery
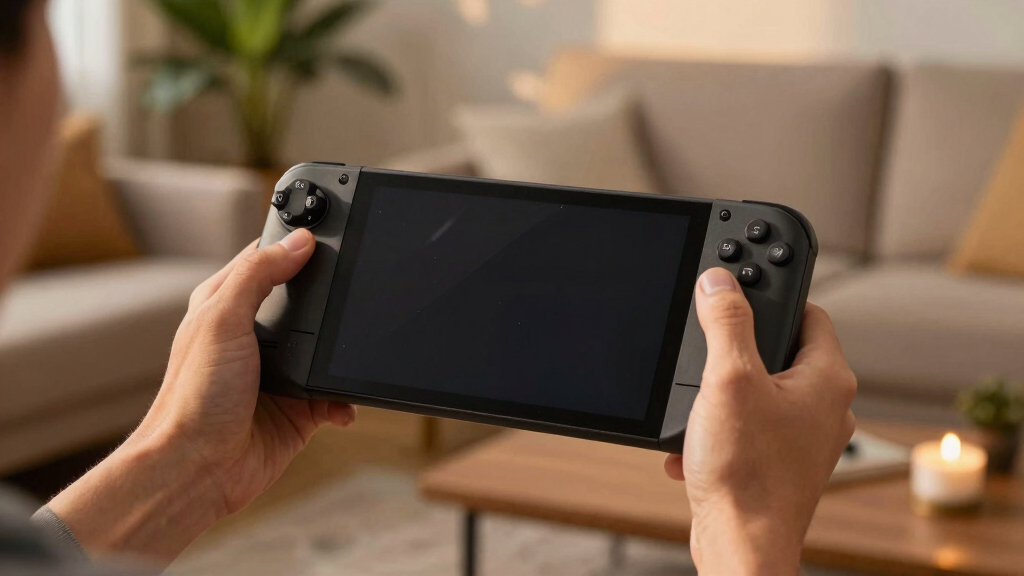
The best OLED screen setup is simple: start with indoor brightness around 50 to 60 percent, let HDR games use HDR, and avoid blasting the panel at full white unless the room forces you. According to Valve, the Deck OLED uses a 7.4-inch HDR OLED panel with up to 90Hz refresh rate [1].
- Dim room: lower brightness until black menus look inky but text still feels crisp.
- Bright room: raise brightness in small steps instead of jumping straight to full power.
- HDR games: test HDR in-game, then compare a dark scene and a sunlit scene before keeping it on.
- Retro and pixel games: try a lower brightness setting first; saturated colors can look candy-bright on OLED.
Load a game with both darkness and neon, like a city street at night or a torch-lit cave. If the blacks look like wet ink and the highlights pop without washing out faces, you are close. If your eyes feel tired after ten minutes, pull the brightness back.
As an affiliate, we earn on qualifying purchases.
Protect Your Saves Before You Leave Your PC Behind
The Steam Deck OLED Setup Steps New Owners Should Not Skip include signing in, turning on Steam Cloud for supported games, and checking Wi-Fi before a 70GB download starts. According to Steam Support, Steam Cloud can keep supported saves synced between devices [2]. That matters when your desktop and Deck trade the same campaign.
Do a small test before you trust it. Open a cloud-supported game on your PC, save in an obvious place, then launch it on the Deck and check whether that save appears. A single test can save you from replaying a boss fight on a train with bad Wi-Fi.
Steam Deck OLED supports Wi-Fi 6E, but your router and network setup decide how much that helps [1]. If downloads crawl, test closer to the router before blaming Steam. Thick walls, old routers, and busy apartment networks can make a shiny new handheld feel strangely slow.
Pick Storage Rules Before Your microSD Card Fills Up
Set storage rules before you install games because the Deck feels cleaner when big, slow-moving titles live in one place and quick experiments live in another. The 512GB and 1TB OLED models give you breathing room, but modern PC games can still eat 80GB in one bite.
| Storage Choice | Best For | Watch Out For |
|---|---|---|
| Internal SSD | Large games you play often, shader-heavy titles, fast loading | It fills quickly if every new game lands there by default |
| microSD card | Indies, older games, emulators, backlog experiments | Use a reputable card and format it through the Deck |
| External drive or dock storage | Desktop Mode work, transfers, temporary libraries | Less handy for handheld play away from your desk |
New owners should treat the internal SSD like the kitchen counter, not the basement. Keep the games you touch every week there. Move the long tail to microSD, where it can sit quietly until a rainy Sunday pulls it back into rotation.
Tune Each Game Instead of Burning Battery Everywhere
Per-game performance tuning gives you more play time without making every title feel dull. Cap demanding games at 30 or 40 frames per second, let lighter games hit 60 or 90, and reduce brightness before you touch power limits. Valve lists a 50Wh battery for Steam Deck OLED [1].
- Big open-world games: try 30fps or 40fps for steadier pacing and less heat.
- 2D games and older PC games: try 60fps or 90fps if battery life still feels good.
- Flights and commutes: lower brightness, cap frames, and avoid background downloads.
- Docked play: raise limits only if the game actually benefits from it.
Here is the real-world test: play a demanding game for ten minutes at uncapped settings, then set a frame cap and listen. If the fan softens from a sharp hiss to a low breath and the game still feels smooth, you found free comfort.
Key habit: save performance settings per game. One global setting cannot treat a pixel-art platformer and a new open-world RPG fairly.
Fix Controls Once, Then Save the Layout
Controller setup pays off because the Deck is both a handheld and a tiny PC with trackpads, gyro, touch, and a full Steam Input toolbox. Fix each awkward game once, save the layout, and the machine starts to feel custom-made, like a worn controller that already knows your grip.
For a strategy game with tiny menus, picture dragging units across a map in Civilization or clicking through small inventory tabs in an old PC RPG. Use the right trackpad as a mouse, map a back button to pause, and put zoom on the left trackpad or a shoulder button so your thumbs stop doing three jobs at once.
For a shooter, start with the official layout, then add gentle gyro aiming only after the stick gets you close. It is like using a steering wheel for the turn and your fingertips for the last inch of parking. For a racing game, you might leave gyro off, map rear buttons to gear shifts, and keep the face buttons free for camera and reset.
Do not chase the perfect layout for an hour before playing. Make one useful change, save it, and test it in motion. Your hands will tell you more in five minutes than a settings screen will in fifty.
Add Extras Only After the Basics Work
Add extras after the basics work because docks, Desktop Mode, emulators, and Windows can solve real problems while adding new ones. A bad USB-C hub, a sketchy download, or a rushed dual-boot can turn a quiet first night into file cleanup and forum searching.
- Dock: useful for monitors, Ethernet, keyboards, and couch-to-TV play.
- Protective case: boring until the first bag toss saves your screen.
- Desktop Mode: good for file management, browsers, and tinkering.
- Emulators: powerful, but only use games and BIOS files you have the right to use.
- Windows: possible for specific games or tools, but it adds driver and storage work.
Ask one plain question before installing anything extra: what problem does this solve today? If the answer is vague, wait. The stock Deck already plays a massive Steam library, and a calm setup beats a crowded one.
Run This 10-Minute Shakedown Before You Call It Done
A 10-minute shakedown catches the small setup mistakes that only show up when you actually play. Test one cloud-save game, one demanding game, sleep and wake, Wi-Fi range, a microSD install, and a charger session before you pack the Deck for a commute or flight.
- Launch a cloud-save game. Confirm your save appears where you expect it.
- Install a small game to microSD. Make sure the card behaves before filling it.
- Play a demanding game for five minutes. Listen for fan noise and watch battery drain.
- Put the Deck to sleep mid-game. Wake it and confirm the game resumes cleanly.
- Move to your usual play spot. Test Wi-Fi from the couch, bed, or desk.
- Plug in and check comfort. Make sure the cable reaches without tugging at the port.
This is where the setup becomes yours. Maybe the bedroom Wi-Fi is weak. Maybe one back button needs a new command. Better to find that under warm lamplight at home than under airport fluorescents with 14 percent battery left.
Frequently Asked Questions
Should I update my Steam Deck OLED before installing games?
Yes. Update SteamOS before big downloads or serious testing because Valve uses software updates to fix bugs, improve compatibility, and adjust system behavior [2]. It gives your first games a cleaner starting point.
What brightness should I use on Steam Deck OLED?
Start around 50 to 60 percent indoors, then adjust by room light and eye comfort. OLED blacks stay rich at lower brightness, so full brightness is often more battery drain than benefit.
Should I install games on the SSD or microSD card?
Put large, demanding, frequently played games on the internal SSD. Use microSD for smaller games, older titles, emulators, and backlog experiments you do not need loaded at maximum speed.
Is Steam Cloud enough to protect my saves?
Steam Cloud is helpful for supported games, but you should test it once with a real save before relying on it [2]. Some games handle saves differently, and a quick check prevents a nasty surprise later.
Should new owners install Windows right away?
Most new owners should set up SteamOS first and play normally for a while. Install Windows only when you have a specific game or tool that needs it, because it adds driver, storage, and maintenance work.
Conclusion
Your first Steam Deck OLED hour should be boring in the best way: update, sync, sort storage, tune the screen, save a few profiles, and test the basics.
Do that once, and the handheld fades into the background. All you notice is the quiet click of buttons, the deep black of the screen, and your game waiting exactly where you left it.
Fall yard work Picks
leaf blowers
As an affiliate, we earn on qualifying purchases.