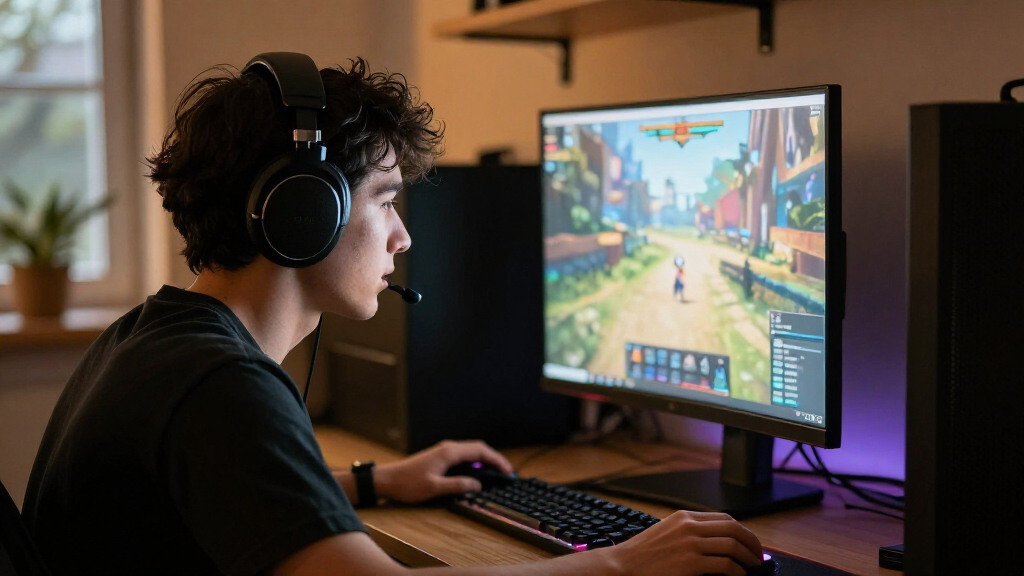

Choose and set up a gaming headset for your PC so you can hear game audio and communicate clearly through the microphone. This guide is for beginners comparing headset options or setting up a headset they already own. Allow 30–60 minutes to check compatibility, connect the headset, adjust Windows sound settings, and test it in a game or call.

Play games on Amazon Luna for your game nights, included with Prime
- A rotating selection of games, no download needed
- Play on TV, laptop or phone
- Fast, free delivery for your gear, too

HyperX Cloud III Wired Gaming Headset
- ✔ Connection: Wired; USB and 3.5 mm
- ✔ Drivers: Angled 53 mm dynamic drivers
- ✔ Microphone: Noise-cancelling 10 mm mic with mesh filter and LED mute indicator

Logitech G733 Lightspeed Wireless Gaming Headset
- ✔ Connection: 2.4 GHz Lightspeed wireless
- ✔ Wireless range: Up to 20 m
- ✔ Battery life: Up to 29 hours

Razer BlackShark V2 X Gaming Headset
- ✔ Connection: Wired 3.5 mm
- ✔ Drivers: 50 mm TriForce Titanium
- ✔ Surround audio: Software-enabled 7.1 for Windows 10 64-bit
Difficulty: Beginner | Time: 30–60 minutes
What You’ll Need
Tools & Materials:
- A Windows PC with an available USB port, 3.5 mm audio jack, or supported wireless connection
- A PC gaming headset and its receiver, charging cable, or audio splitter if supplied
- A game, voice chat app, or recording tool for testing
Knowledge:
- Basic ability to connect a device and open Windows sound settings
Check the headset’s connection type before buying or connecting it. A single 3.5 mm plug may need a splitter on a desktop with separate headphone and microphone jacks. Wireless headsets may require a USB receiver, Bluetooth pairing, or both. Charge the headset and install its official software only if the manufacturer recommends it.
HyperX Cloud III Wired Gaming Headset
The Cloud III earns our top spot for a PC setup that needs dependable wired flexibility. It supports USB and 3.5 mm connections, giving desktop players more than one way to connect, and its listed compatibility extends to consoles, Mac, and mobile devices. The angled 53 mm drivers are tuned for gaming audio, while the noise-cancelling microphone, mesh filter, and LED mute indicator are useful for regular team chat. Compared with the Razer, it offers a broader set of connection options and a more substantial aluminum frame; unlike the Logitech, it does not require a wireless battery routine.Comfort is a central part of its pitch: memory foam sits in both the headband and ear cushions, and the flexible aluminum frame is intended to handle travel and daily use. Earcup volume and mic controls keep common adjustments close at hand. The tradeoff is that this remains a wired headset, so it will not provide the freedom of the G733. Its 53 mm driver specification also does not by itself guarantee a sound profile every listener will prefer. Choose it for a capable, adaptable PC headset; skip it if moving around untethered is a priority.
Pros:
- USB and 3.5 mm connectivity give PC setups useful connection flexibility.
- Memory foam cushions and headband are designed for long sessions.
- Noise-cancelling 10 mm microphone includes a mesh filter and LED mute indicator.
- Aluminum frame and broad platform compatibility suit players who move between devices.
Cons:
- Wired connection limits movement compared with the Logitech G733.
- Its feature-rich design may be more than needed for players seeking a basic, light 3.5 mm headset.
Best for: PC players who want a durable-feeling wired headset with USB and 3.5 mm connection options, direct controls, and a visible mic mute indicator.
Not ideal for: Players who want wireless freedom, or who prefer a headset built around low weight over a more substantial frame.
Bottom line: For a versatile wired PC headset with comfort, clear voice-chat features, and multiple connection options, the Cloud III is the most balanced pick in this lineup.
“For a versatile wired PC headset with comfort, clear voice-chat features, and multiple connection options, the Cloud III is the most balanced pick in this lineup.”
Logitech G733 Lightspeed Wireless Gaming Headset
If a cable across the desk is the problem you most want to solve, the G733 is the clear wireless specialist in this group. Its 2.4 GHz Lightspeed connection is listed with a 20-meter range, and the stated battery life is up to 29 hours. That makes it the obvious choice over both wired competitors for players who like to shift position or use a headset away from the desk. The reversible suspension headband and memory foam earcups also give it a different fit approach from the Razer’s lightweight foam cushions and the Cloud III’s padded headband.Logitech adds dual-zone RGB lighting and Blue VO!CE microphone filters through G HUB, which gives players room to personalize the headset and voice processing. That software emphasis is useful if customization is part of the appeal, but less compelling if you want a plug-and-play setup. The key compromise is no wired fallback: when the battery needs charging, this headset cannot simply switch to an analog cable. It is also the heaviest of the three by the listed weights, at 278 g, though it remains designed for extended wear. Pick it for freedom and personalization; choose HyperX or Razer if you want a direct wired connection.
Pros:
- Lightspeed wireless connection is listed with a 20-meter range.
- Up to 29 hours of stated battery life supports extended play between charges.
- Blue VO!CE filters and dual-zone RGB can be customized in G HUB.
- Reversible suspension headband and memory foam earcups target comfort.
Cons:
- No wired fallback if the headset is out of charge or wireless is unsuitable.
- At 278 g, it is heavier than the listed Razer BlackShark V2 X.
- Lighting and mic filter customization depend on Logitech G HUB.
Best for: PC gamers who want a wireless connection, long stated battery life, and software-based lighting and microphone customization.
Not ideal for: Players who need a wired backup, prefer not to manage battery charging, or want to avoid companion software for customization.
Bottom line: The G733 is the right pick when cable-free PC play and customization outweigh the need for a wired backup.
“The G733 is the right pick when cable-free PC play and customization outweigh the need for a wired backup.”
Razer BlackShark V2 X Gaming Headset
At a listed 240 g, the BlackShark V2 X is the lightest option here, making it a sensible choice for PC players who want to keep headset weight down. Its 3.5 mm connection is uncomplicated, and the closed earcups with passive noise isolation are designed to help limit outside sound. Razer’s 50 mm TriForce Titanium drivers are divided for separate tuning of highs, mids, and lows, while the cardioid HyperClear mic is shaped to pick up more voice and less sound from behind and the sides. In contrast with the Cloud III, this model is simpler on connections; compared with the G733, it avoids battery management altogether.The headset’s 7.1 surround audio is software-enabled and specified for Windows 10 64-bit, so PC buyers should check that this restriction fits their system before treating surround as a deciding feature. The basic analog connection can be convenient, but it lacks the USB option listed for HyperX and the wireless mobility of Logitech. Its 1.3-meter cable may also feel limiting if the PC tower or audio jack is far from the seat. Choose the Razer for low weight and straightforward wired use; look elsewhere if you need multiple connection types or a longer reach.
Pros:
- Listed weight of 240 g is lower than either competitor.
- 3.5 mm wired connection avoids charging and wireless setup.
- Closed earcups and cushions provide passive noise isolation.
- Cardioid microphone pattern is designed to emphasize voice over sounds from the sides and rear.
Cons:
- 7.1 surround feature is software-enabled and limited to Windows 10 64-bit.
- 3.5 mm connection is less flexible than the Cloud III’s listed USB and analog options.
- The listed 1.3-meter cable may not reach comfortably in every PC setup.
Best for: PC players who prioritize a lightweight headset, a simple 3.5 mm connection, and passive isolation from closed earcups.
Not ideal for: Players seeking wireless play, USB connection flexibility, or software surround support beyond the stated Windows 10 64-bit limitation.
Bottom line: Choose the BlackShark V2 X when a low listed weight and uncomplicated analog connection matter more than wireless or connection versatility.
“Choose the BlackShark V2 X when a low listed weight and uncomplicated analog connection matter more than wireless or connection versatility.”
As an Amazon Associate we earn from qualifying purchases.
Before You Start
Check the headset manual for its supported connection and any required drivers. If you use a work or school PC, you may need administrator access to install manufacturer software. Keep the volume low while testing, then raise it gradually to a comfortable level.
Step-by-Step Instructions
Step 1: Choose a headset that fits your PC and needs
Decide how you will use the headset: competitive gaming, casual play, voice chat, or a mix. Compare comfort, microphone quality, connection type, and price. Confirm that the headset supports your PC’s ports or wireless options. Look for an adjustable headband, earcups that fit comfortably, and a microphone you can position near your mouth. If you play for long sessions, check the headset’s weight and return policy.
Tip:Surround sound labels do not guarantee better positioning in every game. Check compatibility with the games and audio features you use.
Check: You have a headset that works with your PC and meets your comfort, microphone, and budget needs.
Step 2: Connect or pair the headset
Turn down the PC volume, then connect the headset using the method specified in its manual. Plug a USB headset or wireless receiver directly into a PC port. For a 3.5 mm headset, use the combined headset jack if available; if your PC has separate headphone and microphone jacks, connect the headset through its supplied splitter. For Bluetooth, put the headset in pairing mode and add it through Windows Bluetooth settings. Turn on the headset and check that it is charged.
Tip:Use the supplied wireless receiver when the headset supports one. Bluetooth may add delay or reduce microphone and audio quality during calls.
Check: The headset powers on, appears as a connected device in Windows when applicable, and produces audio at a low volume.
Step 3: Select the headset as the output device
Open Windows Settings and go to System, then Sound. Under Output, select the headset or its playback device. Play a short audio clip and adjust the volume with the Windows control and the headset’s own dial or buttons. If the headset offers separate game and chat output devices, choose the game device for general sound and follow the manufacturer’s instructions for chat audio.
Tip:Some USB headsets show multiple output names. If you are unsure which to choose, check the manual or test each at low volume.
Check: Windows sound plays through the headset, and the volume is comfortable and easy to adjust.
Step 4: Set the headset microphone as input
In Settings under System and Sound, select the headset microphone under Input. Speak at a normal volume and watch the input meter. Position a boom microphone near the corner of your mouth, not directly in front of it. If the headset has a mute switch, turn mute off for testing. Open your voice chat app and choose the same microphone in its audio settings, unless you want to use a different mic.
Tip:Some headset microphones are muted when raised or retracted. Check the headset’s mute indicator if the input meter stays still.
Check: The Windows input meter responds to your voice, and the voice chat app lists the intended microphone.
Step 5: Adjust audio and microphone levels
Use a game, voice chat app, or the Windows microphone test to check both sides of the headset. Set the microphone level so your voice is clear without clipping or sounding distorted. Adjust game volume, chat volume, and any headset balance control so you can hear teammates without making game audio uncomfortably loud. Disable extra processing or virtual surround features if they distort sound, then test again.
Tip:Make one change at a time. This makes it easier to identify which setting caused muffled audio, echo, or distortion.
Check: You can hear game audio clearly, and a recording or teammate confirms that your voice is understandable.
Step 6: Test the headset in your usual setup
Launch a game or voice chat session and confirm that sound comes through the headset and your voice reaches other people. Check for echo, dropouts, background noise, and sound coming from the wrong device. If you use a wireless headset, test it from your usual seat and check the battery indicator. Save the working device selections in the game or app if it has separate audio settings.
Tip:Recheck the game’s own audio settings; some games keep a different output or microphone selection from Windows.
Check: The headset works in the game or chat app you use, with stable audio and clear microphone sound.
Common Mistakes to Avoid
- Buying a headset with a connector the PC cannot use. —
Check the PC ports and the headset’s connection requirements before purchasing. Account for a supplied splitter or receiver.
- Leaving Windows or the game set to another audio device. —
Select the headset for both output and input in Windows, then check the game and voice chat app separately.
- Setting the microphone too loud or too close to the mouth. —
Watch the input meter while speaking normally, and move the microphone near the mouth without placing it directly in front of your breath.
- Testing at a high volume from the start. —
Lower PC and headset volume before connecting or testing, then increase it gradually.
Troubleshooting
Problem: No sound comes through the headset.
Solution:
Check that it is powered on and connected, then select it under Windows Sound output. Confirm that the game uses the intended output device, raise the headset’s own volume, and reconnect the cable or receiver.
Problem: The microphone does not pick up your voice.
Solution:
Choose the headset microphone under Windows Sound input and in the app. Check the mute switch, boom position, wireless battery, and any required splitter. If the input meter still does not move, try another port or follow the manufacturer’s driver instructions.
Problem: Other people hear echo or distorted audio.
Solution:
Lower the microphone level and headset volume, move the microphone away from the earcup, and check whether speakers or another microphone are active. Disable audio effects temporarily to identify whether they are causing the problem.
Problem: Wireless audio cuts out or has noticeable delay.
Solution:
Move closer to the receiver, connect it directly to the PC, and charge the headset. If you are using Bluetooth, try the supplied receiver if available and close other devices that may be competing for the connection.
What Success Looks Like
The headset is comfortable, selected as the intended Windows audio device, and works in your usual game or chat app. Game sound is clear at a comfortable level, the microphone captures understandable speech, and there are no persistent dropouts, echo, or distortion.
Next Steps
Keep the headset charged and store it where the cable, microphone, and earcups will not be strained. Recheck Windows and app device selections after major updates or when connecting another audio device. Clean the earcups and microphone according to the manufacturer’s care instructions.
Frequently Asked Questions
Can I use a console gaming headset on a PC?
Often, yes. Check whether it connects by USB, 3.5 mm, Bluetooth, or a wireless receiver supported by your PC. Some console features or companion software may not work on Windows.
Do I need a USB headset for PC gaming?
No. A USB headset is one option; a 3.5 mm headset or supported wireless headset can also work. Match the headset connection to your PC and check whether a splitter or receiver is needed.
Why does my headset have separate game and chat devices?
Some headsets expose separate playback channels so you can balance game sound and voice chat. Select the appropriate channel in Windows or the headset software, then choose the intended device in each app.
Should I use Bluetooth for gaming?
You can, if the headset and PC support it, but Bluetooth may introduce audio delay or lower sound quality when the microphone is active. A manufacturer’s wireless receiver may provide a better gaming connection.
How can I tell if the microphone is working before joining a game?
Open Windows Sound input settings and speak while watching the input meter, or make a short test recording. Confirm that the correct microphone is selected and not muted.